
How to Attach Wood Trim to Metal Studs

Many living areas are built with metal studs, which creates a challenge when no wood backing was initially installed. Though there are some difficulties to overcome, attaching trim to metal studs is not unusual in commercial construction and in multi-unit homes.
Things You Will Need
- Drill
- 9/64-inch drill bit
- 2 1/4 inch square-drive, fine-threaded trim screws
- Construction adhesive
- Stud finder or magnet
- Nail gun and nails
You can successfully install your trim to your metal studs once you know the process.
Attaching Trim Where a Stud is Found
-
Locate the steel studs with a magnet or stud finder where the trim will be attached. If using a magnet, hold the magnet between your thumb and first finger while sliding it against the wall. Keep the magnet about 1/8 of an inch from the wall. You will feel a tug where the studs are located.
-
Drive an 8d finish nail into the wall to verify the stud locations.
-
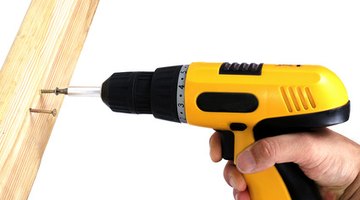
Drill a 9/64-inch pilot hole in the trim at each stud location.
-
Attach the trim with a drill and 2 1/4-inch fine-threaded trim screws.
Attaching Trim to the Wall Where There is No Stud
-
Apply construction adhesive on the back of the trim.
-
Set the trim in its location and place two nails in opposite directions into the drywall. This technique helps to keep the trim from pulling away from the wall. This must be done with a nail gun.
-
Apply pressure to the trim by placing a kicker against it. Creativity is essential here. Use a 3/4-inch board to but against a wall or cabinet and the trim. This is only necessary if the trim is not sitting tight against the wall.
Tip
Do not over-tighten the screws. If your studs are of a light gauge, the screw could strip out. When backing out screws, be careful not to blister the wood. The wood may enclose around the screw and, when backed out, cause a large splinter to pop up.
Warning
Use shorter fasteners around pocket doors or you may nail or screw into the door.
Writer Bio
Doug Berthon is an enrolled agent and owns ProActive Tax & Accounting LLC. He earned his Bachelor of Science in accounting from Metropolitan University in St. Paul, Minn.
Photo Credits
- Turn of on screw image by Marek Kosmal from Fotolia.com
- Turn of on screw image by Marek Kosmal from Fotolia.com
More Articles