
How to Build a False Wall Over Garage Doors

A false wall is a non-load-bearing wall meant to act as a shield to cover something unsightly or to act as a divider in a pre-existing room. A false wall may be as simple as fabric attached to a frame, or more complex, like drywall attached to a frame.
It is not uncommon for homeowners seeking more space in their house to convert their garage into a living space by covering the interior of the garage door with a false wall.
Things You Will Need
- 2-by-4 lumber (for studs)
- Circular saw
- Measuring tape
- Pencil
- 10d Nails
- Hammer
- Stud finder
- Drill
- Drywall screws
- Utility knife
- T-Square
- Drywall compound
- Drywall knife, 8-inch, 10-inch and 12-inch
- 120-grit sandpaper
- Trim
Constructing The Frame
-
Cut two studs to the length of the wall, so they span the distance from one side of the garage to the other. These are the top and bottom plates of your wall frame. Use a circular saw to cut the studs.
-
Measure the height of the wall you plan to construct and subtract 3 inches from that height, to accommodate the height of the top and bottom plates. Cut two studs to this length and nail a stud to each side of the frame, sandwiched between the top and bottom plates, so that the studs and plates form a giant rectangle.
-
Mark the bottom and top plate every 16 inches from the stud on the left until you reach the right side of the frame. Count the number of marks you made on the bottom plate. This is the number of studs you need to install in the frame.
-
Cut the number of studs you need in the frame with the circular saw and lay the studs down in the frame. Nail them into place.
-
Run a stud finder across the wall perpendicular to the garage door on the right. Move the stud finder around until you find the stud in the wall that is nearest to the garage door. Mark this spot with a pencil, and then repeat this process on the wall to the left of the garage door.
-
Ask a friend to help you stand the frame up and position it in front of the garage door. Nail the frame into the studs you marked on the wall in Step 5.
Drywall Installation
-
Lift the first sheet of drywall and place it in a horizontal position against the frame on the left-hand side. Line up the top of the drywall with the top of the wall. Have a friend hold the drywall while you screw it into the studs using a drill and drywall screws. Insert screws every 18 inches along each stud.
-
Install the next sheet of drywall directly to the right of the first sheet, so the edges are touching. Have another hold the second piece of drywall as you screw it into place.
-
Repeat Step 2 to install drywall along the top of the frame until the entire first course of drywall has been finished. If you need to cut the final piece of drywall to fit in the remaining space, measure the remaining length of frame and mark this length on the drywall. Hold a T-square to the mark you made, and use a utility knife to score the new edge of the wall. Break the dry wall along the score, then use the utility knife to cut through the paper on the back.
-
Install the second course of drywall directly beneath the first course, using the same installation techniques. The second course of drywall should fit over the entire bottom of the frame, but if you have space for a partial third course beneath the second course, you need to cut the drywall to fit in the remaining space.
-
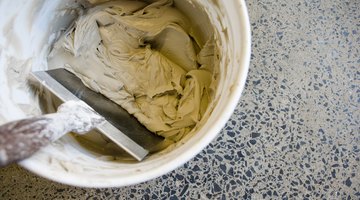
Mix your drywall compound in a bucket according to the manufacturer's instructions.
-
Scoop up a little compound on your 8-inch drywall knife and spread the compound over the joints, including the joints between the ceiling and the top of the wall. Spread the compound evenly over both sides of the joints. Take this time to cover screw and nail heads with compound as well.
-
Connect the joints with drywall tape, then run the flat side of the drywall knife over the tape to remove excess compound. Wait one day for the compound to dry before proceeding to the next step.
-
Mix more drywall compound and scoop it up with your 10-inch knife. Apply the drywall compound over the taped areas, applying more pressure to the outside of the knife than the inside, in order to feather the application of compound. Try to fill in any cracks and uneven areas in the joints. Wait one day for the compound to dry then proceed to the next step.
-
Mix the drywall compound one more time, then scoop it up with your 12-inch knife. Apply drywall compound to the taped areas, applying more pressure to the outside of the knife than the inside.
-
Sand any remaining ridges or uneven areas in the joints, using 120-grit sandpaper.
-
Measure the bottom of the wall and cut a length of trim to fit over the joint between the wall and the floor. Nail the trim to the wall. You may want to wait to do this after you've installed flooring in your garage, unless you plan to leave the floor as is.
Tip
Do not install a false wall in front of a garage door that leaks or has moisture problems. Seal the garage door properly before beginning this project.
Warning
Use safety glasses when using a circular saw.
The Drip Cap
- A false wall is a non-load-bearing wall meant to act as a shield to cover something unsightly or to act as a divider in a pre-existing room.
- Use a circular saw to cut the studs.
- This is the number of studs you need to install in the frame.
- Move the stud finder around until you find the stud in the wall that is nearest to the garage door.
- Install the next sheet of drywall directly to the right of the first sheet, so the edges are touching.
- The second course of drywall should fit over the entire bottom of the frame, but if you have space for a partial third course beneath the second course, you need to cut the drywall to fit in the remaining space.
- Spread the compound evenly over both sides of the joints.
- Wait one day for the compound to dry before proceeding to the next step.
- Mix the drywall compound one more time, then scoop it up with your 12-inch knife.
- Apply drywall compound to the taped areas, applying more pressure to the outside of the knife than the inside.
Writer Bio
Leslie Rose has been a freelance writer publishing with Demand Studios since 2008. In addition to her work as a writer, she is an accomplished painter and experienced art teacher. She has a Bachelor of Arts degree in art with a minor in English.
Photo Credits
- Jupiterimages/Photos.com/Getty Images
- Jupiterimages/Photos.com/Getty Images
More Articles