How to Pour a Concrete Driveway on Clay
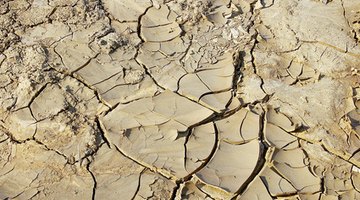
A strong, long-lasting concrete driveway requires solid bedding upon which to sit. Clay as a substrate beneath concrete has certain disadvantages that require addressing before you can pour a slab that can support a vehicle's weight without cracking over the years. Clay soil has the tendency to shift over time, expanding and contracting according to local weather conditions at a greater pace than subsoil without the high clay content. Proper preparation of the subsoil prior to pouring can overcome these problems and provide you with a solid base on which to pour your new concrete driveway.

Things You Will Need
- Lawn flags
- Spade
- Vibratory plate compactor
- Concrete form
- Wooden stakes
- Hammer
- Nails
- Straight edge
- Contractor’s level
- Road base
- Water hose
- Concrete blocks
- ½-inch steel reinforcing mesh
- Concrete mix
- Concrete mixer
- Concrete control joints
- Screed
- Bull float
- Push broom
- Plastic sheeting
- Bricks
- Concrete sealant
A strong, long-lasting concrete driveway requires solid bedding upon which to sit. Clay as a substrate beneath concrete has certain disadvantages that require addressing before you can pour a slab that can support a vehicle’s weight without cracking over the years. Clay soil has the tendency to shift over time, expanding and contracting according to local weather conditions at a greater pace than subsoil without the high clay content. Proper preparation of the subsoil prior to pouring can overcome these problems and provide you with a solid base on which to pour your new concrete driveway.
-
Prepare a base onto which you’ll be pouring the concrete for the driveway. Mark the driveway borders using a series of lawn flags to outline where you wish to place the driveway. Excavate the area between the flags to a depth between four and ten inches. Determine the depth according to the weight of the vehicles that you intend to place onto the driveway, with heavier vehicles requiring greater depth to contain thicker layers of road base and a thicker concrete slab. Create a slope of one-eighth inch per foot of driveway length, sloping away from the foundation of any structures to allow for water drainage.
-
Compact the clay at the bottom of the excavation with a vibratory plate compactor. Move the compactor along the surface of the soil to compress the soil and create a firm subbase. Rent compactors from either a home improvement store or an equipment rental shop.
-
Build your driveway form that will determine the shape of the driveway. Place boards along the edges of the excavation, rising to the desired height of your driveway surface, level with the surrounding ground. Secure the boards in place by driving stakes into the ground outside the pouring area, three feet apart along the board lengths. Nail the stakes to the boards to hold them securely in place. Make sure the two sides are level by placing a contractor’s level along a straight edge spanning the boards and making adjustments as needed. For curves in the driveway, use ¼-inch bent plywood instead of straight boards.
-
Place a layer of road base into the excavation to form a drainage bed for the concrete and to provide a buffer between shifting clay and the concrete slab. Pour the road base into the excavation two inches at a time, compacting the mixture with the plate compactor between layers until you’ve reached the depth of road base you desire. Use a minimum of two inches of road base per two inches of concrete slab poured.
-
Wet down the road base prior to pouring the concrete to keep the mixture from leeching away moisture from the concrete. Keep the road base damp without pooling water on its surface.
-
Place small square concrete blocks along the surface of the road base, placing them half the height of the remaining excavation depth and about five feet apart. Place reinforcing mesh onto the blocks to create a sturdier slab.
-
Mix the concrete according to the manufacturer’s instructions in a concrete mixer. Use a high strength mix of 4000 psi or more to minimize freeze and thaw damage. Pour the mixture into the forms, spreading it evenly along the driveway excavation to form the driveway slab. Place a control joint every 12 feet, at least one-quarter of the depth of the slab. The control joint is a piece of material intended to cushion the slab parts during the expansion and contractions of the concrete so that the slab won’t crack and break due to weather changes.
-
Use a screed to level the concrete. Drag the wooden screed board atop the two sides of the concrete forms in a sawing motion to remove excess concrete. Go over the surface of the concrete with a bull float to help settle the aggregate and draw water to the top of the slab to aid in curing. Allow the slab to set; firming typically occurs after about six hours. Go over the surface of the slab with a bristle broom to create a roughened texture that forms a non-slip surface.
-
Cover the concrete with plastic sheeting held down on the soil to the side of the driveway with bricks and allow it to cure for ten days to two weeks. After curing, remove the forms and spray the surface of the driveway with concrete sealant for protection.
References
Resources
Writer Bio
Larry Simmons is a freelance writer and expert in the fusion of computer technology and business. He has a B.S. in economics, an M.S. in information systems, an M.S. in communications technology, as well as significant work towards an M.B.A. in finance. He's published several hundred articles with Demand Studios.
Photo Credits
- drought image by Valery Sibrikov from Fotolia.com
- drought image by Valery Sibrikov from Fotolia.com
More Articles


