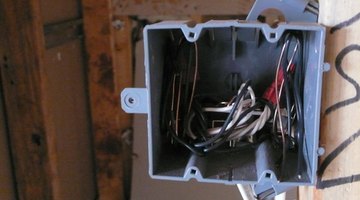
How to Add Electrical Boxes to the Middle of a Cable Run
Connecting to or tapping into an existing branch circuit may mean connecting to the cable in the middle of the cable run, which requires adding a junction or outlet box. Adding a box in the middle of the run requires sufficient slack in the existing cable to accommodate the new box.

Things You Will Need
- No-contact voltage tester
- Cable stripper
- NM sheathed cable
- Wire nuts
If there is not enough slack in the cable, a second box will have to be installed so that additional cable can be added to the run.
-
Turn off power at the circuit breaker. Test the circuit with the no-contact voltage tester to ensure the power is off. Bring the tester probe close to the cable. The lamp will light if the electricity is not off.
-
Cut the cable in two places about two feet apart with the cable stripper. Strip about 7 inches of sheathing from one end of the cable and insert the stripped end into the box so that a minimum 1/4 inch of sheathing will be inside the box. Fasten the box in this location with two screws or nails. Repeat this for a second box where the second cut was made.
-
Cut a piece of sheathed cable long enough to run between the two boxes and have an additional 7 inches inside each box. Strip 7 inches of sheathing from each end of the cable and insert one end into each box.
-
Strip 1 inch of insulation from the wires in the first box. Twist the wire ends together with the lineman's pliers for each pair of wires; black to black, white to white and bare to bare. Three-wire cable may also have a red wire. Cap each connection with a wire nut by twisting it on until no bare copper shows. Push the wires into the box and screw the cover on the box.
-
Install a third cable in the second box to extend the circuit. Strip 7 inches of sheathing from the cable and insert it into the box, keeping at least 1/4 inch of sheathing inside the box for all three cables. Strip 1 inch of wire insulation from all the wire ends and twist the wire ends together matching insulation colors as before. Make connections for black to black, white to white, red to red and bare to bare. Cap each connection with a wire nut. Place the wires in the box and screw the cover to the box.
Tip
You can use a receptacle in the second box instead of a cable. Place the black wires on the brass terminal screws, the white wires on the silver terminal screws and the bare wires on the green terminal screw. Wrap the wire ends clockwise around the screws and tighten firmly.
Warning
Always work with the power off and test to be sure it is off.
References
- "Basic Wiring"; Time Life Books; 1994
Resources
Tips
- You can use a receptacle in the second box instead of a cable. Place the black wires on the brass terminal screws, the white wires on the silver terminal screws and the bare wires on the green terminal screw. Wrap the wire ends clockwise around the screws and tighten firmly.
Warnings
- Always work with the power off and test to be sure it is off.
Writer Bio
Michael Logan is a writer, editor and web page designer. His professional background includes electrical, computer and test engineering, real estate investment, network engineering and management, programming and remodeling company owner. Logan has been writing professionally since he was first published in "Test & Measurement World" in 1989.
Photo Credits
- electrical box image by jimcox40 from Fotolia.com
- electrical box image by jimcox40 from Fotolia.com
More Articles


