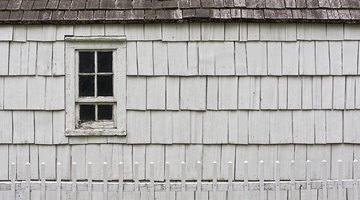
How to Paint Wood Shingles
New cedar shingles are more frequently stained than painted, but painted wood shingles are much less maintenance-intensive. Stains will only hold up on cedar shingles for two to three years, while a quality paint will serve as an attractive finish for 10 to 15 years.

As with all painting, surface prep is the key to success. The steps required for painting your cedar siding will be roughly the same whether the shingles are newly installed, previously stained or previously painted. Get professional help if you suspect paint previously applied to the shingles may contain lead.
Things You Will Need
- Canvas drop cloths
- Lightweight plastic drop cloths
- Painter's tape
- Sanding block
- Ladder or scaffold
- Pressure washer with detergent
- Tack cloth
- Safety glasses
- Disposable respirator
- Acrylic latex primer
- Acrylic latex paint
- Airless sprayer system
Tip
Start this project when you are confident of favorable weather conditions -- three days with temperatures above 50 degrees and below 95 degrees Fahrenheit when no precipitation is expected. Wear protective glasses and respirator when sanding, washing and painting. Acrylic latex paints will outperform and outlive ordinary latex or oil paints because they offer greater expansion and contraction during changing weather. As a rule, these higher grade paints also contain higher-quality pigments for more lasting color. An all-purpose acrylic latex primer will prove adequate in most circumstances, but you can also find specialty primers designed for use on damaged substrates. While you can also apply paint by brush or roller, a spray application will ensure more even coverage and much greater speed. Both pressure washers and airless sprayers are available for short-term rental from paint stores and equipment rental specialists. In most cases, you should use a 515 tip for spraying exterior acrylic latex primer and paint, but confirm this setting for the paint you aim to apply by reading the paint manufacturer's directions.
Warning
If any previous coats of paint were applied to the shingles before 1978, have the surface tested using a lead test procedure approved by the U.S. Environmental Protection Agency before sanding or washing. Consult a lead abatement professional if the test confirms the existence of hazardous levels of lead.
To avoid injury, do not direct the pressure washer or spray gun at any person nearby.
-
Spread canvas drop cloths over any shrubbery, pavement, lawn furniture or decking. Remove shutters. Attach thin plastic drop cloths over windows and doors, fastened by painter's tape. Apply painter's tape over any exterior hardware -- such as flagpoles -- or decorative trim. Use a ladder or scaffold to reach higher areas if necessary.
-
Sand off any extreme protrusions from the shingles using a sanding block -- but do not sand the shingles to perfect smoothness. Any grooving or irregularity serves to demonstrate that the shingles are natural, not vinyl. Climb a ladder, if necessary, to reach higher points on the wall.
-
Wash down the shingles using a pressure washer set at 1,500 pounds per square inch to remove surface dirt. Add detergent to the pressure washer to remove stubborn stains and debris, and wash the shingles again. Finish the wash-down by running plain water through the pressure washer to rinse off any residual detergent from the siding. Hold the nozzle at a 45-degree angle from the wall while cleaning. Allow the siding two days to dry completely.
-
Apply an acrylic latex primer to the shingled siding using an airless sprayer. Allow the primer two hours to dry, or as directed on the product's label.
-
Spray on the first of two coats of an acrylic latex paint, using an airless sprayer. Allow the paint two hours to dry, or as directed on the label. Follow up by applying a second coat.
The Drip Cap
- New cedar shingles are more frequently stained than painted, but painted wood shingles are much less maintenance-intensive.
- Apply painter's tape over any exterior hardware -- such as flagpoles -- or decorative trim.
- Add detergent to the pressure washer to remove stubborn stains and debris, and wash the shingles again.
- Allow the primer two hours to dry, or as directed on the product's label.
- Follow up by applying a second coat.
References
Resources
Writer Bio
Mike Matthews is editor of Green Building Product News, a national publication that covers sustainable innovations in building and remodeling, and he has spoken at national conferences on green building. He has also served as founding editor of "Paint Dealer" magazine.
Photo Credits
- sbonk/iStock/Getty Images
- sbonk/iStock/Getty Images
More Articles


