How to Build a Cob Fence
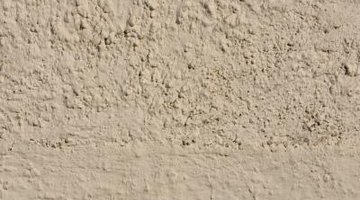
Cob is an earthen building material. It closely resembles adobe and mudbrick. You can use cob to build ovens, homes and fences. Though working with cob is time consuming, a well built fence will last for decades. The cob-working process falls into three stages: laying a foundation, mixing the cob, and constructing the fence.
Laying the Foundation

Step 01
Select the fence site. The more level it is, the easier your task will be.
Step 11
Dig the fence line. Create a ditch at least six inches deep and six inches wide. Your goal is to remove the loose topsoil and hit the harder earth underneath. The wider your foundation, the sturdier your fence will be.
Step 21
Tamp the ditch. Make the soil hard, flat and level.
Step 31
Lay two to three inches of gravel in the ditch. This will provide drainage and deter erosion.
Step 41
Gather large, flat stones that will fit your ditch. Each stone should be larger than your hand.
Step 51
Layer the stones in your ditch. Put the heaviest rocks on the bottom layer. Fit the remainder together like a puzzle. You want the rock foundation to be as tight as possible. It should be at least three inches above the soil.
Step 61
Test your foundation by standing on it and rocking. If the stones wobble, they're not sturdy enough. Reconfigure them. Remember that the more tightly you layer them, the sturdier they'll be.
Mix the Cob
Step 01
Place clay in a bucket of water. Let it soak overnight.
Step 11
Lay a tarp on the ground. Select a flat piece of your yard with few rocks, twigs or other objects that might jab your bare feet.
Step 21
Mix equal portions of sand and clay. Use just enough to create a hand-sized brick. Place the ingredients on the tarp and use your hands and bare feet to mix. Flip the mixture by pulling up an edge the tarp. Flip it regularly to ensure an even mix.
Step 31
Add straw to the mix. Do not use hay. Your goal is to have just enough straw that it adds structural support, but not so much that it visibly overpowers the clay. If you can see clean straw, then you've added too much.
Step 41
Wait for the mix to dry. This could take an hour. If the brick cracks, then you need more sand in your mix. If sand flakes off the surface, then you need more clay. Adjust your mixture and try again. Once you've found the perfect ratio, then you're ready to start building the fence.
Build the Fence
Step 01
Mortar the foundation with cob. Use a trowel to fill in the foundation's holes and cracks. Once you're done, cover the foundation with a tarp and wait a day for it to dry.
Step 11
Moisten the cob the next morning. Cover it again and wait another day. Do this for a week. This process will solidify the foundation.
Step 21
Place a three-inch layer of cob on top of the foundation. Walk back and forth across the cob to compress it into the stone. Add another three-inch layer and repeat until the cob starts to bulge at the side. This is your cue to let the cob dry.
Step 31
Grab a stick and puncture three-inch deep holes along the top of the fence. Space the holes three inches apart from each other. Place a tarp over the fence and wait a day for the cob to dry.
Step 41
Uncover the fence the next morning. Add another three inches of cob. Walk along the fence to compress the cob. Alternatively, place your palms on the cob and lean into it. Continue doing this until the fence is at its desired height.
Step 51
Trim the sides of your fence with a machete. Ideally, the fence will taper upwards, so that it is thickest at the base and thinnest at the top. A six-foot fence should taper four inches. Once it's trimmed, your fence is ready.
References
Photo Credits
- Jupiterimages/Photos.com/Getty Images
More Articles


