How to Build an Electrolysis Tank
Electrolysis is the process of pulling apart compounds by running an electric current through them. Natural materials that possess several useful compounds are separated using this method, although there are commercial uses. Those who possess iron that has been subjected to the elements that would otherwise make the material unusable have turned to this process to extend the metal's lifespan. Small-scale electrolysis can be done using a reusable electrolysis tank as outlined below.
Building an Electrolysis Tank
Step 1

Fill the plastic container with 10 gallons of distilled water. Mix 2 cups of sodium carbonate to the water. Arm & Hammer Super Washing Soda is a good source of sodium carbonate, also known as dense soda ash.
Step 2

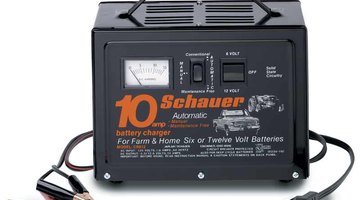
Attach the car battery cable to the battery charger; this gives you a longer cable to work with and increases the safety of the project. Do not plug the charger in yet.
Step 3
Connect the positive side of the charger to the piece of scrap iron. This is known as the anode and will draw the grime towards it. Place the anode into the mixture.
Step 4
Connect the negative end of the charger to the item you wish to clean. This item is referred to as the cathode. Place the cathode into the solution near the anode. Do not let the two items touch.
Step 5
Once the anode and cathode are in the solution, turn on the battery charger. The lower the amp setting, the longer the process will take. At 15 amps, the electrolysis should take about four hours to complete.
Step 6
Check the anode every hour. You will notice a metallic buildup and a think gray liquid on the scrap metal.
Step 7
When the cathode is clean, turn off the battery charger and remove the object from the solution. Wash any loose particles off the object and apply your chosen method of rust prevention.
Warnings
- Make sure the location where you use the tank is well ventilated. The process releases gas that could be harmful if inhaled.
- Exercise caution when using the battery charger. Even low levels of electricity can cause injury.
Writer Bio
Dan Chruscinski has written pieces for both business and entertainment venues. His work has appeared in "Screen Magazine" as well as websites such as Starpulse.com. Chruscinski graduated in 2006 with a degree in English literature from Illinois State University.
More Articles


