How to Insulate a Farm Silo for Habitation
Farm silos are a new concept in sustainable home design that are eco-friendly and inexpensive. These structures are weather-resistant, recyclable and inviting to passive solar heating and cooling systems. The steel with which they are constructed has a polished look and will eventually dull to gray, avoiding the need to paint the exterior. The experience is novel and the ecological footprint is negligible. The insulation of these silos does require a high degree of preparation and material to ensure a comfortable interior. Straw-bale insulation is one of the most effective ways to insulate these structures as that material is plentiful on farms.

Step 1
Obtain necessary measurements. According to the website of Alminco, a grain-storage company, the three parts of the silo that require insulation are the roof (usually conical or domed), the sidewall (cylinder) and the floor (usually on a concrete footing). The height and diameter of the silo should be given to you upon purchase; if not, measure these dimensions and make a note.
Step 2
Spray polyurethane insulation (spray-foam insulation) 1-inch thick on the sidewall, the gap between the concrete foundation and the sidewall and on the roof. Make sure the coating is even on all of these surfaces. This will provide the backing for your straw-bale insulation. The roof of the silo will automatically prevent snow build-up due to its conical shape. However, it must be insulated and sealed properly to avoid any cold air seeping in from the top of your new home. The spray-foam insulation also acts as a vapor barrier to prevent any excess moisture from the warm interior from permeating the straw and collecting against the steel wall making the straw wet and less durable.
Step 3

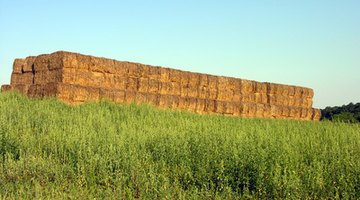
Install the straw bales in neat rows in a staggered pattern as you would lay brick. This will increase the strength of the insulation against the spray-foam insulation and the steel sidewall behind it. The straw-bale units are already packed tightly and will stack together easily. The Food Forest website cites a research study at the University of Arizona in 1993 in which straw bales were found to have an R-value of 30 to 40. This would mean that this type of insulation is extremely effective for cold climates especially as the higher the R-value, the warmer the insulation will keep your interior. The Northern states closest to the Great Lakes would benefit most from this type of home and insulation as they face the harsher effects of wind, snow, and hail. The colder the climate, the better straw bale construction will be for your comfort. It is not advisable to insulate with this material in the Southern states, since the R-value is too high.
Step 4
Inspect the straw-bale insulation you have created. Ensure there are no gaps.
Step 5
Prepare the natural plaster. Plaster the straw-bale insulation carefully. Smooth it into any gaps and even it out over the entire surface of the sidewall. Once dry, this plaster will serve as your interior wall surface. It is durable and adheres easily to the straw bales.
References
Resources
Writer Bio
Rosalind Mohammed began writing in 2002. She contributes to various websites, specializing in writing about art and design-related topics. She holds a Bachelor of Environmental Design from the Ontario College of Art and Design and an honors Bachelor of Arts in English and fine art history from the University of Toronto.
Photo Credits
- silo image by Richard Kane from Fotolia.com
- stacked hay bales 02 image by Michael Cornelius from Fotolia.com
More Articles


