
How to Clean a Garden Sprayer
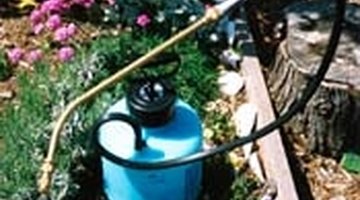
How to Clean a Garden Sprayer. A garden sprayer is handy to have on hand to apply various pesticides. It's important to keep sprayers in good working order so that they remain safe when applying insecticides, fungicides and herbicides. Given proper care, a sprayer will last for many years.
Things You Will Need
- Rubber Boots
- 1-gallon Garden Sprayers
- Gardening Gloves
- Pollen/dust Masks
- Safety Goggles
-
Use every bit of the pesticide in the sprayer. Never leave unused chemicals in the sprayer for more than a few hours.
-
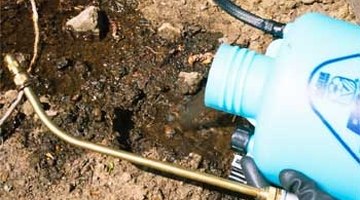
Clean the empty tank over a dirt area, never over concrete or in a sink. Unused chemicals may flow into waterways, causing harm to fish and wildlife. Make sure you have plenty of fresh water on hand.
-
Open the sprayer slowly to release the pressure.
-
Fill the tank with fresh, clean water, close the lid, then swish the water around inside the tank.
-
Pump up the pressure and spray the fresh water through the nozzle.
-
Unscrew the nozzle fitting to check for clogs. Spray clear water though the nozzle with the head fitting removed.
-
Dislodge small particles from the nozzle with a small twig or blade of grass. Never use wire to clean the nozzle since it may scratch the metal and cause a change in the flow pattern.
-
Release the pressure, open the lid and pour the water onto the bare soil. If you are working with a garden hose as your source of water, let it run to dilute the chemical on the soil.
-
Rinse the tank three separate times, spraying clean water through the nozzle each time.
-
Store the tank upside down with the lid open.


Tip
Spray WD-40 on all moving parts including the handle and the pump.
Warning
Wear your safety gear while cleaning the tank. This includes goggles, respirator, neoprene gloves and rubber boots.
Tips
- Spray WD-40 on all moving parts including the handle and the pump.
Warnings
- Wear your safety gear while cleaning the tank. This includes goggles, respirator, neoprene gloves and rubber boots.
Writer Bio
This article was written by the CareerTrend team, copy edited and fact checked through a multi-point auditing system, in efforts to ensure our readers only receive the best information. To submit your questions or ideas, or to simply learn more about CareerTrend, contact us [here](http://careertrend.com/about-us).
More Articles