How to Repair Tiger Oak Veneer
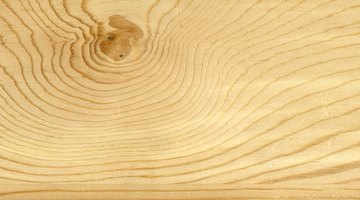
Tiger oak is a common veneer on older oak furniture. The tiger striping is a result of the cutting method that reveals pockets of irregular grain. Repairing tiger oak veneer requires the same techniques as any veneer repair.

Things You Will Need
- Household iron
- Damp rag
- Wax paper
- J roller or rolling pin
- Utility or craft knife
- Wood glue
- Plywood scrap
- Heavy books or bricks
- Solvent-based wood filler
- Clear nail polish
- C clamp
Most veneer damage is due to one of three causes: water can cause veneer to lift or bubble from the surface; heat has similar effects; and trauma, such as blows or scratches that can cause splits and cracks in the veneer. The repair method is matched to the type of damage.
Blistered or Bubbled Veneer
-
Heat a household iron to it's highest setting. Apply a damp rag to the bubbled area. Set the iron on top of the wet rag, and press down firmly for 10 to 15 seconds. Many times this will reactivate the adhesive, allowing the veneer to be pressed back into place.
-
Press the veneer down with a J roller or rolling pin to press it back into place. Set a piece of wax paper over the repair, and weight it down overnight with a piece of plywood and a few heavy books or bricks.
-
Cut a small incision in the center of a bubble that does not respond to the heat treatment. Inject a small amount of wood glue into the incision with a syringe. Press the bubble, and weight it down as outlined above.
-
Repair cracks in the center of veneer using the syringe method outlined for blisters. Inject glue into the crack, press and add weight. Fill any remaining gap in the surface with an appropriate color of solvent- based wood filler. Gently sand the area with 220-grit sandpaper by hand. Add a coat of matching stain and a coat of clear nail polish to complete the repair.
Loose or Lifting Edges
-
Lift the veneer gently from the edge to avoid splitting. Brush or scrape any debris out from under the veneer. Scrape away as much of the old glue as possible, and make sure to remove any dust.
-
Apply a light coat of wood glue to the underside of the veneer. Press the veneer into place with a J roller or rolling pin. Wipe away any excess glue with a damp rag. Cover the repair area with wax paper.
-
Place a piece of plywood over the entire repair area. Clamp it to the surface with a C clamp, and allow it to dry overnight.
Replacing Damaged Areas
-
Replace missing pieces by cutting a diamond shape around the damaged area with a utility knife or razor craft knife, and remove the veneer inside the diamond. Use a sharpened wood chisel to lift out the veneer.
-
Trace the diamond cut onto a piece of paper by placing the paper over the cut and following the outline with a pencil. Cut the paper diamond out with a pair of scissors.
-
Use the paper diamond as a pattern to cut out a matching piece of veneer. Apply wood glue to the back of the veneer and work it into the diamond cutout. Cover with wax paper, and clamp or weight as described above. Add stain and clear nail polish to finish.
References
- “Veneer Restoration and Repair”:Jim Stacey, 21st Century Wood Doctor, 1995
- This Old House: Fast Fix for Blistered Veneer
Writer Bio
Mark Morris started writing professionally in 1995. He has published a novel and stage plays with SEEDS studio. Morris specializes in many topics and has 15 years of professional carpentry experience. He is a voice, acting and film teacher. He also teaches stage craft and lectures on playwriting for Oklahoma Christian University.
Photo Credits
- wood texture image by Aleksey Bakaleev from Fotolia.com
- wood texture image by Aleksey Bakaleev from Fotolia.com
More Articles


