
How to Wire Dusk to Dawn Security Lights

Dusk-to-dawn security lights automatically turn on whenever the sun dips below the horizon and turn off whenever dawn breaks.
Similar in function to a motion sensor, the photo sensors used in dusk-to-dawn security lights measure the level of daylight and only allow the fixture to turn on whenever the amount of natural light has diminished to the appropriate level. Light fixtures controlled by photo sensors stay on all night and therefore provide both increased security and decorative accent lighting to your home's exterior. This type of light fixture may seem difficult to wire, but the job is actually uncomplicated and only takes a few minutes.
Things You Will Need
- Dusk-to-dawn security light
- Screwdrivers
- Voltage tester (touch-type)
- Wire strippers
- Needle-nose pliers
- Wire connectors
- Electrical tape
- Caulk
-
Turn off the breaker that powers the circuit and test the wires for voltage before you touch any of them. Press the button on the tester and touch the tip of it to each wire to make sure the circuit is dead. If the tester beeps or lights up, then the circuit is still live. Try additional breakers until you find the correct one.
-
Strip away about 3/4-inch of insulation from the ends of the wires in the wall box using the wire strippers.
-
Place the weatherproof gasket onto the security light before the wire connections are made. The gasket comes packaged with the security light and is required in order to prevent water from getting behind the fixture and into the wiring box.
-
Connect the ground wire from the dusk-to-dawn security light fixture to the ground wire in the wall box using a wire connector.
-
Connect the white wire from the fixture to the white wire (or wires if another light is fed from this same circuit) in the wall box. Twist the copper ends of the wires together using the needle-nose pliers, then secure the connection with a wire connector and wrap the connection with electrical tape.
-
Connect the black wire from the fixture to the black wire(s) in the wall box by twisting the copper part of the wires together with the needle-nose pliers and securing the connection with a wire connector.
-
If the dusk-to-dawn security light is brand new, the photo sensor will already be pre-wired so all you have to do is connect the black wire to the black wire(s) as instructed above.
-
If the photo sensor is NOT pre-wired, then connect the white wire from the photosensor to the other white wires in the box, connect the red wire from the photosensor to the black wire from the fixture and connect the black wire from the photosensor to the black wire(s) in the box.
-
When making these connections, twist the copper ends of the wires together using the needle-nose pliers, then secure each connection with a wire connector and wrap each one with electrical tape.
-
Secure the security light to the wall box and make sure all of the wires are inside the box and none are hanging out.
-
Run a bead of caulk along the top half of the fixture but not all the way around the bottom. This is to help prevent water from getting behind the fixture, and by leaving the bottom un-caulked, it gives the water a way out of the fixture if any happens to still get in.
-
Install the light bulbs and turn the breaker back on. The lights should turn on for a few seconds and then automatically turn off.
Tip
Always test your tester on a circuit that you know is working before you test the circuit you are going to be working on. This is to ensure the tester is functioning properly. Troubleshooting a circuit often means that you will be testing live wires. If you are afraid or unsure of your ability to work with an electrical circuit, please call an electrician to perform this job.
The Drip Cap
- Dusk-to-dawn security lights automatically turn on whenever the sun dips below the horizon and turn off whenever dawn breaks.
- Connect the white wire from the fixture to the white wire (or wires if another light is fed from this same circuit) in the wall box.
- Connect the black wire from the fixture to the black wire(s) in the wall box by twisting the copper part of the wires together with the needle-nose pliers and securing the connection with a wire connector.
- Secure the security light to the wall box and make sure all of the wires are inside the box and none are hanging out.
- The lights should turn on for a few seconds and then automatically turn off.
Writer Bio
Based in Atco, NJ, Dave Donovan has been a full-time writer for over five years. His articles are featured on hundreds of websites, and have landed him in two nationally published books "If I Had a Hammer: More Than 100 Easy Fixes and Weekend Projects" by Andrea Ridout and "How to Cheat at Home Repair" by Jeff Brendenberg.
Photo Credits
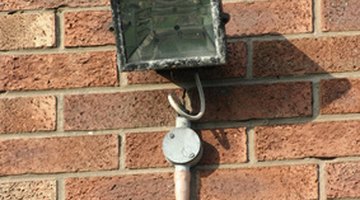
- battered security light image by green308 from Fotolia.com
- battered security light image by green308 from Fotolia.com
More Articles