
How to Prevent Wood Checking

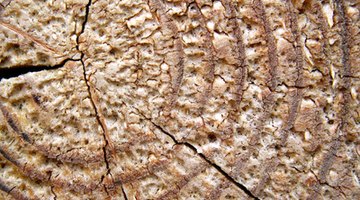
Wood shrinks as it dries but if it dries unevenly, the faster-shrinking areas pull apart from the slower-drying ones, creating cracks and splits called "checking."
If you cut a tree and want to use the wood for carving, turning or furniture making, you need to dry it carefully, taking into consideration the forces working within the wood, or you may find your finished project marred with a split along the grain or open cracks in the end grain.
Things You Will Need
- Hatchet or draw-knife
- Varnish, paint or other wood sealant
- Paint brush
- Shed, barn, garage or tarp covering
- 4-by-4-inch scrap lumber, 4 feet long
- 1-by-1-inch stickers, 2 to 4 feet long
-
Remove the bark with a hatchet or a draw-knife if it's already loose, to discourage damage from insects that live under the bark. If the bark is tight, leave it on to help slow drying of the outer layer of the wood.
-
Coat the exposed end grain of the logs or boards with a thick layer of paint, varnish or a commercial green-wood sealer to prevent moisture from escaping too quickly. Wood loses moisture 10 to 15 times faster through the ends than it does through the faces.
-
Clear a space in a sheltered area large enough to spread out the wood. Choose a shed, barn or garage, or plan to cover the wood with a loose tarp propped up so air can circulate under it. The area should have some air circulation but prevent rain from wetting the wood.
-
Stack any thick wood blocks or logs loosely. If the area doesn't have a floor, place scrap lumber under your wood to keep it away from contact with the ground.
-
Place the scrap wood crosswise on the ground every 2 feet to support already sawn lumber you need to dry. Set one layer of the boards you're drying across the scrap lumber. Place 1-by-1-inch slats of scrap wood called "stickers" across the boards every 2 feet. Set another layer of boards on the stickers, add more stickers and continue until you're stacked all the boards with stickers between them to allow air to reach between the layers.
-
Inspect the lumber every few weeks and improve air circulation if you notice signs of mold. As a general rule, allow one year of natural air-drying time for each inch of thickness.
-
Move the wood to an area similar to its final location so it can adjust to the moisture in the air, with stickers placed between boards again. If you'll be using the wood in full sunlight, move it into the sun. If the wood will be used in indoor furniture, for example, you can saw or split the wood into pieces closer to their finished size to save space, then stack it indoors where it can adjust to household humidity. Allow one week to several weeks, depending on the thickness of the wood, for the final acclimation.
Tip
If the wood is a foot or more longer than you'll need, you can omit coating the ends and trim off any checking that occurs in the ends before using it. If you must stack the wood from the start in a very dry area, prevent it from drying too quickly by covering it with plastic. Loosen the plastic if heavy condensation builds up on the inside.
The Drip Cap
- Wood shrinks as it dries but if it dries unevenly, the faster-shrinking areas pull apart from the slower-drying ones, creating cracks and splits called "checking." If you cut a tree and want to use the wood for carving, turning or furniture making, you need to dry it carefully, taking into consideration the forces working within the wood, or you may find your finished project marred with a split along the grain or open cracks in the end grain.
- If the bark is tight, leave it on to help slow drying of the outer layer of the wood.
- Stack any thick wood blocks or logs loosely.
- Inspect the lumber every few weeks and improve air circulation if you notice signs of mold.
References
Writer Bio
David Thompson began writing for eHow in 2009. He has written how-to articles on home improvement, carpentry, cabinet making and gardening.
Photo Credits
- lumber image by Igors Leonovs from Fotolia.com
- lumber image by Igors Leonovs from Fotolia.com
More Articles