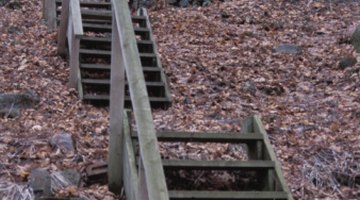
How to Build Steps on a Steep Hill Side
Traversing a steep hill can be a difficult proposition, particularly for those who have disabilities which lessen their ability to walk around on their own. Building a set of steps converts a steeper hill from impassible into a reasonable walkway.

Not only can you build the stairs out of wood beams and red brick without the help of a professional, but it also creates an eye-pleasing set of stairs that will dazzle visitors.
Things You Will Need
- Tape measure
- Stakes
- Mallet
- Shovel
- String
- Wood 6-by-6-inch beams
- Saw
- Drill
- Rebar
- Galvanized spikes, 12 inches long
- Gravel
- Sand
- Tamp
- Bricks
- Broom
-
Measure the rise, the vertical distance of the slope, and the run, the horizontal distance of the slope, in inches.
-
Divide the rise of the slope by 6 inches, rounding up, to determine the number of steps you will need.
-
Put stakes in the ground at the bottom of the slope and the top of the slope to mark out the footprint of the steps, then tie string around the perimeter of the four stakes.
-
Divide the run by the number of steps to determine the length of each step.
-
Dig a trench for the runners of the bottom step with an angular-U shape. Runners are made from wood 6-by-6 boards, so the trenches must be 6 inches wide, with the bottom trench as wide as the desired staircase width and the arms 6 inches longer than the determined step length.
-
Cut wood 6-by-6 boards as wide as your stairs so there is one more piece cut than there are steps in the staircase.
-
Cut two 6-by-6s as long as the step length for every step except the top step, and two 6-by-6s as long as the step length minus 6 inches for the top step.
-
Drill through both ends of one 6-by-6 as wide as the staircase and two 6-by-6s as long as the stair length, 3 inches in from each end and centered across the 6-inch width.
-
Place the drilled beams into the trench.
-
Drive a piece of rebar through both holes in the beams to secure them.
-
Dig out the interior of the step, keeping a straight edge from the end of one side beam to the other.
-
Dig a trench for the side beams of the next highest step.
-
Place a side beam in each trench, and a cross beam at the end of the beams atop the frame for the bottom step, and secure in place with a 12-inch spike through the beams and into the side beams of the step below.
-
Dig out the interior of the step, keeping a straight line across the back.
-
Continue adding steps until you have framed the top step. As the top step does not need to extend under the step above it, its side bars are not cut with the extra 6 inches.
-
Pour a mix of gravel and sand into each step, tamping every few inches poured. Continue adding until the mixture is high enough in each step that a brick placed atop it is level with the top of the frame for that step.
-
Lay bricks inside the frames, with a 1/8-inch gap between bricks.
-
Pour masonry sand over the top of the bricks and brush over them with the broom until the sand settles between the bricks.
The Drip Cap
- Traversing a steep hill can be a difficult proposition, particularly for those who have disabilities which lessen their ability to walk around on their own.
- Divide the rise of the slope by 6 inches, rounding up, to determine the number of steps you will need.
- Place the drilled beams into the trench.
- Dig out the interior of the step, keeping a straight line across the back.
Photo Credits
- Hemera Technologies/AbleStock.com/Getty Images
- Hemera Technologies/AbleStock.com/Getty Images
More Articles


