
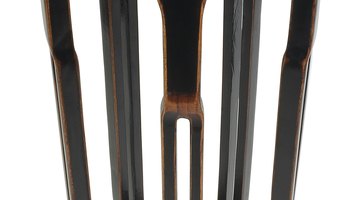
How to Create the Japanese Lacquer Look and Finish
Traditional Japanese lacquer craftspeople use a lacquer derived from the sap of the Chinese Lacquer tree to create their distinctive pieces. This lacquer, called urushi, undergoes a chemical reaction with the air as it cures, unlike the nitrocellulose lacquer used in the furniture industry.
Things You Will Need
- Brushable lacquer
- Pigments
- Selection of artist's brushes
- 400- and 600-grit wet/dry sandpaper
- Gold sprinkles
The way that urushi cures -- and its relatively slow drying time -- allow artisans to apply multiple ultra-thin coats with a paintbrush. If you want to simulate the look and finish of traditional Japanese lacquerware without urushi, you need a comparable material. You'll achieve the best results using brushable lacquer for all coats.
-
Start with a well-sanded, smooth surface or substrate. Japanese lacquerware pieces often have a substrate made with cedar wood or bamboo, but it can also be paper, leather or even metal. Check the item's surface to ensure it is free of milling marks, chips, gouges or nicks before proceeding. Any defects on the item will show up in its finish.
-
Mix the brushable lacquer -- available from any paint or home improvement store -- with the pigment to add color. Pour a bit of the pigment into the lacquer from a jar or squeeze it from a tube, stirring the mixture as you work. Stop adding pigment when you obtain the color you want. Brushable lacquer contains retarding thinners that keep it wet longer than spray lacquer. As a result, it levels better and makes a smoother surface.
-
Paint a thin coat of the pigmented lacquer onto the item using a high-quality artist's brush. Size the brush according to the amount of area you need to cover, keeping in mind that the open time of the lacquer -- the amount of time it stays wet -- is probably about 20 minutes.
-
Let the lacquer dry for several hours, as per the manufacturer's instructions on the product. It won't cure like urushi, so there's no need to wait for several days between coats as Japanese artisans do.
-
Sand the lacquer lightly with 400-grit wet-dry sandpaper, then wipe off the sanding dust and apply another thin coat of lacquer. You can build up several coats or the item's finish in this way. Japanese lacquerware pieces typically have as many as 20 coats of urushi or more. Wet the sandpaper with water to sand the last few coats, but don't sand the final coat.
-
Paint two of three coats of clear lacquer over the finished piece. The clear coat adds extra protection for your item. Sand the undercoats with moistened 600-grit wet-dry sandpaper, but don't sand the last coat.
Tip
Keep in mind that western lacquer products behave very differently than urushi, and without real Japanese lacquer, you'll only be able to approximate Japanese techniques. You might have to use a trial and error process to achieve the look you want. Practice on small pieces of scrap wood until you can replicate the Japanese lacquer look and finish. Choose high-quality artist brushes to avoid the brush shedding strands or hairs in the lacquer as you work. Keep your brush clean by washing it in lacquer thinner. Let it dry out thoroughly between coats because pure lacquer thinner will dissolve your work. Some high-gloss enamels can be used under a lacquer or varnish to create a similar look.
Warning
Don't use spray lacquer in place of brushable lacquer as it won't provide the finish you want.
Work in a well ventilated room or wear a mask to prevent breathing noxious lacquer fumes, thinner or other solvents.
Tips
- Keep in mind that western lacquer products behave very differently than urushi, and without real Japanese lacquer, you'll only be able to approximate Japanese techniques. You might have to use a trial and error process to achieve the look you want. Practice on small pieces of scrap wood until you can replicate the Japanese lacquer look and finish.
- Choose high-quality artist brushes to avoid the brush shedding strands or hairs in the lacquer as you work.
- Keep your brush clean by washing it in lacquer thinner. Let it dry out thoroughly between coats because pure lacquer thinner will dissolve your work.
- Some high-gloss enamels can be used under a lacquer or varnish to create a similar look.
Warnings
- Don't use spray lacquer in place of brushable lacquer as it won't provide the finish you want.
- Work in a well ventilated room or wear a mask to prevent breathing noxious lacquer fumes, thinner or other solvents.
Writer Bio
Chris Deziel has a bachelor's degree in physics and a master's degree in humanities. Besides having an abiding interest in popular science, Deziel has been active in the building and home design trades since 1975. As a landscape builder, he helped establish two gardening companies.
Photo Credits
- Hemera Technologies/PhotoObjects.net/Getty Images
- Hemera Technologies/PhotoObjects.net/Getty Images
More Articles