
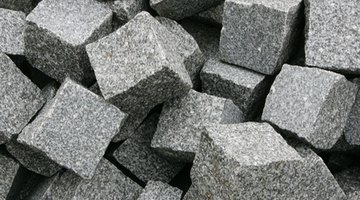
How to Cut Granite With Hand Tools

Typically cut and molded with the help of high-powered electrical saws, granite presents a stubborn challenge for hand tool carvers.
Since much of the mineral make-up of granite is quartz crystal, steel hand tools cannot scratch or cut the material and will quickly get ruined, while “bonded diamond” blades (a special diamond dip reserved for soft stone) will only last a few minutes against granite’s sturdy surface. For consistent and reliable results, hand tool users must first chisel the surface of a given section of granite before proceeding with a diamond-tipped handsaw in order to make deep and consistent cuts in the stone.
Things You Will Need
- Granite section
- Carbide-tipped point chisel
- Diamond-tipped handsaw
- Mallet
- Measuring tape
- Ruler
- Wax pencil
- Safety goggles
- Safety gloves
- Electric diamond-wheel grinder (optional)
- Container of hot water (optional)
Tip
A more expensive and considerably quicker method for cutting granite would be to utilize a wet tile circular saw with diamond-tipped blades in place of the handsaw. Granite can sometimes prove difficult even for circular saw cuts, however, so practice carefully and immediately stop if the granite section jerks to makes sudden movements.
Warning
Always practice caution when working with sharp tools. Ensure that no animals or children enter the working area while you are cutting the granite and return all tools to storage to prevent accidental injury when unattended.
-
Designate a work surface of sufficient lighting for the chiseling and cutting of your granite section. Clear the area of any excess dirt, dust, or debris and place each tool within easy reaching distance.
-
Position the granite section directly in front of you so that it is clearly visible, clean the surface of any debris, and measure the desired lengths and cuts that you wish to make. Add an extra 1/6 of an inch for the chisel and saw blade width and mark the measurements with your wax pencil in a straight line with the help of a ruler.
-
Put on your safety goggles and gloves and position the carbide-tipped point chisel directly in the top edge of your marked line–this should be at one of the edges of the granite section. Hold the grip of the chisel with the point resting against the granite and, with your other hand, gently tap the head with the mallet.
-
Chisel a groove at least 1/2 inch in depth at this corner. Next, chisel marks directly along the straight line you drew across your granite section. Ensure that your chisel marks are in a perfect line and continue until you have chiseled at least six inches along the line from the end of the granite.
-
Place the chisel and mallet aside and insert the blade of your diamond-tipped handsaw into the groove you made with your chisel. Cut the granite with a sawing motion until you have successfully cut the entire section, wetting the blade as desired to cut down on dust accumulation.
-
Continue until the entire line of the granite is cut with the handsaw. Using the point chisel or an electric diamond-wheeled grinder, finish the granite into a polish and finished shape as desired.
The Drip Cap
- Typically cut and molded with the help of high-powered electrical saws, granite presents a stubborn challenge for hand tool carvers.
- Add an extra 1/6 of an inch for the chisel and saw blade width and mark the measurements with your wax pencil in a straight line with the help of a ruler.
- Chisel a groove at least 1/2 inch in depth at this corner.
- Using the point chisel or an electric diamond-wheeled grinder, finish the granite into a polish and finished shape as desired.
References
Resources
Writer Bio
Based in the Appalachian Mountains, Brian Connolly is a certified nutritionist and has been writing professionally since 2000. He is a licensed yoga and martial arts instructor whose work regularly appears in “Metabolism,” “Verve” and publications throughout the East Coast. Connolly holds advanced degrees from the University of North Carolina, Asheville and the University of Virginia.
Photo Credits
- granite image by Andrzej Solnica from Fotolia.com
- granite image by Andrzej Solnica from Fotolia.com
More Articles