
How to Apply Joint Compound With Paint Roller

Spice up plain walls by adding a little texture. Joint compound, used to fill the seams between drywall panels, does double duty as the material used in texturing.
Applying the compound to your walls is only the first step in the texturing process; you’ll have to use a brush, sponge or trowel to add a design to the wet joint compound.
Things You Will Need
- Premixed joint compound
- Water
- 5-gallon bucket
- Drill with paddle attachment
- Paint roller
- Extension pole
- Large paint roller pan
- Non-slip drop cloths
- Protective eye wear
- Old clothing
- Painter's tape
Tip
Recruit an assistant to roll on the joint compound while you follow behind applying texture to the wall or skimming the wall smooth. Use a brush, a crumpled-up rag, or a sponge for a spackled texture effect. Smooth out joint compound with a wide taping trowel (skim coating) or use a small trowel to form a swirl texture.
Warning
Rolling on joint compound is only the first step in finishing a wall and is not intended to be a finish in itself.
-
Prep the wall by removing outlet and switch covers and taping over the electrical boxes beneath. Cover the floor with a non-slip drop cloth and wear protective eye wear to keep stray droplets of joint compound out of your eyes. Bryan Tradem, author of “Working With Drywall,” recommends taping plastic film over windows and doors to protect them from joint compound splatters.
-
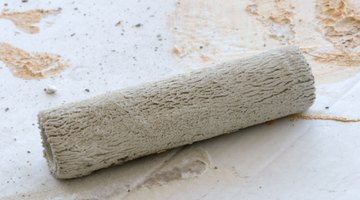
Fit a paint roller handle with a large-nap roller for texturing or a small-nap roller for skim coating. Skim coating is the process of rolling joint compound on the walls and then smoothing it out with a wide trowel.
-
Thin premixed joint compound with water in a 5-gallon bucket. Add just enough water to premixed joint compound until it’s the consistency of pancake batter. Use a paddle attachment, fitted to a drill, to mix the thinned compound until no lumps remain.
-
Fill a large paint roller pan about halfway with the thinned compound.
-
Attach an extension pole to the paint roller handle and dip the roller into the compound in the paint pan. Lift the roller carefully; it will be heavy and messy. Joint compound will drip from the roller, so transfer it quickly to the wall.
-
Roll the joint compound evenly on the wall without using pressure. Start at one side of the room and roll the compound from the top of the wall to the bottom, working your way across the wall to the other side.
-
Apply the joint compound evenly for the best results.
The Drip Cap
- Spice up plain walls by adding a little texture.
- Use a paddle attachment, fitted to a drill, to mix the thinned compound until no lumps remain.
- Roll the joint compound evenly on the wall without using pressure.
- Start at one side of the room and roll the compound from the top of the wall to the bottom, working your way across the wall to the other side.
References
- “Working With Drywall”; Bryan Tradem; 2009
Writer Bio
Glenda Taylor is a contractor and a full-time writer specializing in construction writing. She also enjoys writing business and finance, food and drink and pet-related articles. Her education includes marketing and a bachelor's degree in journalism from the University of Kansas.
Photo Credits
- Jupiterimages/Photos.com/Getty Images
- Jupiterimages/Photos.com/Getty Images
More Articles