How to Make Decorative Concrete Curbing
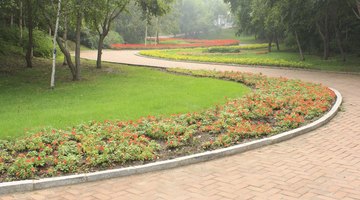
Decorative concrete curbing has many benefits when used around a flower garden or other landscaping bed in a lawn. Curbing holds expensive bedding material in place so it does not wash into the lawn when torrential rainstorms occur.

The concrete edging also prevents grass from growing into the bed and decreases the time needed to hand-pull weeds in the bed. Making your own decorative curbing allows you to choose the design you wish and add a splash of color to it for a border that really pops.
Mold Shapes
Concrete molds are available in a wide selection of shapes and sizes. Some produce decorative curbing that is round, square, angled or has an architectural slant on top. Molds also are available for mower-edge curbing, which has one side that is short, about 3 to 4 inches tall; its other side, which faces the inside of a plant bed, is usually about 6 inches tall. With the shorter edge facing the lawn, you can use a lawn mower to cut the grass next to the mower-edge curbing, eliminating the need to use a weed eater to trim around the curbing.
Concrete Colors
Concrete dyes are available in a large array of colors, allowing you to match your home or landscaping or to provide a bright outline on your decorative curbing. Concrete dyes are simple-to-use liquids. Add one to your concrete mix then stir the mix, and add more dye as needed to make the color brighter until you achieve the results you want.
Necessary Materials
Choose your concrete curbing molds in the style you like. Purchase ready-to-mix concrete powder in bags and dye. The project also requires some cooking spray and a trowel. A wheelbarrow and garden hoe are needed for mixing the concrete, and a garden hose is helpful to use to add water. Plastic wrap is necessary to cover the concrete mixture as it hardens.
The Process
Spray your concrete curbing mold with cooking spray, getting it into all of the mold's corners. The cooking spray allows the finished curbing to release easily from the mold. Combine concrete mix with water in a wheelbarrow by using a hoe and according to the mix's package instructions. Add dye to the mixture, if desired, to achieve the concrete curbing color you want, stirring the dye thoroughly with the mixture. Counting the number of dye drops you use is helpful for future reference. Fill about three-quarters of the mold with the concrete mixture, and bounce the mold gently on a hard surface such as a workbench or an outdoor table to remove air bubbles from the mixture. Fill the mold to its top with more concrete mixture. Then the wet mixture's surface can be smoothed with a trowel. Cover the mold with plastic wrap, and let it dry, or cure, in a shady, covered area for at least 24 hours. Afterward, the decorative curbing can be removed from the mold and installed around your flower garden or other plant bed.
The Drip Cap
- Decorative concrete curbing has many benefits when used around a flower garden or other landscaping bed in a lawn.
- The concrete edging also prevents grass from growing into the bed and decreases the time needed to hand-pull weeds in the bed.
- Concrete dyes are available in a large array of colors, allowing you to match your home or landscaping or to provide a bright outline on your decorative curbing.
- Choose your concrete curbing molds in the style you like.
- Plastic wrap is necessary to cover the concrete mixture as it hardens.
- Fill the mold to its top with more concrete mixture.
References
Writer Bio
Mary Lougee has been writing for over 10 years. She holds a Bachelor's Degree with a major in Management and a double minor in accounting and computer science. She loves writing about careers for busy families as well as family oriented planning, meals and activities for all ages.
Photo Credits
- daizuoxin/iStock/Getty Images
- daizuoxin/iStock/Getty Images
More Articles


