


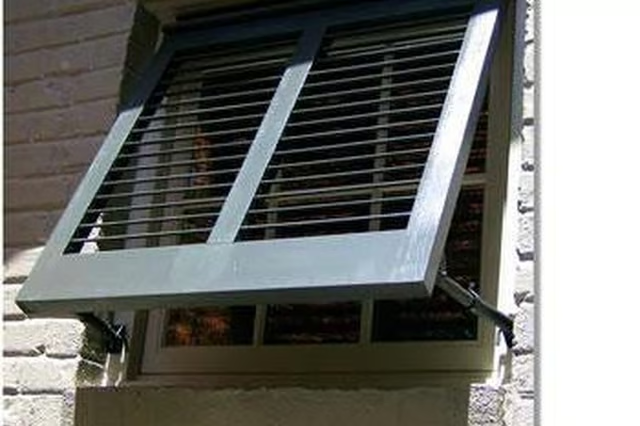
With some homework and added expenditure, skilled homeowners can build their own hurricane code-compliant shutters.
Things You Will Need
-
Plan ahead and simplify your task. If you are planning to build Bahama (also called Bermuda or "Tropical" shutters) to be used as storm shutters, check with your local building codes to find out what type of wood, hardware and construction specifications you must meet before beginning. Florida has a statewide code for these exterior shutters, but in some areas, cities publish these requirements. In all cases, Bahama shutters must be designed to fit inside the building frame over the window frame so when closed, the surface of the shutter forms a single surface with the building face.
-
Design your shutters and estimate materials. Bahama shutters are fixed louvered shutters consisting of one or more mullions (panes or, in this case, sets of louvers). They are hinged at the top to tilt open and pull closed into the window opening. This allows them to ventilate without being lifted by wind. Take measurements of the insides of windows to be fitted with shutters. Then, find hinges and braces to hold your shutters open where storm shutter hardware is sold. Use one-by-two to one-by-four-inch wood, depending on the overall size of the finished shutter. Figure the angle of the louvers to match the angle of the shutter when it's propped all the way open. This way, light is allowed in and occupants can have a fairly unobstructed view outside when the shutters are open.
-
Frame the shutter. Cut rails (vertical edges) to run the entire height of the window and stiles (the horizontal pieces of the frame) to fit between outside rails. Be sure to add at least an inch on either side for tenons. If you plan more than one mullion, cut them to fit between the outside stiles, not alongside them, again adding a total of one inch for each tenon. Use wider boards for the bottom stile larger shutters to provide more stability for mullions.
-
Prepare mortises on the outer rails and tenons on the outer stiles using a router or a backsaw, drill and mortise tool. Make a line of mortises up the inside of each rail to fit the ends of the louvers (fit the ends of the louvers into the mortises). Carefully measure and mark before cutting to ensure level louvers. Clean up corners with a chisel and mallet or sandpaper. Dry-fit pieces as you go, gluing nothing until all joints have been fabricated. Cut mortises in the stiles and tenon mullion rails to match. Cut the louvers to fit the frame. Dry fit the whole shutter before beginning.
-
After fitting, sand the ends of the wood lightly and seal them with a bit of varnish. Glue the shutter together, beginning with the interior mullions or one side of the shutter. Clamp or tie the assembled shutter and let dry overnight. Sand the whole piece lightly before finishing with stain and varnish or exterior paint.
The Drip Cap
- Bahama shutters give maximum shade and ventilation--a great combination if you live in a tropical or desert area where the sun is bright and the days are hot.
- If you are planning to build Bahama (also called Bermuda or "Tropical" shutters) to be used as storm shutters, check with your local building codes to find out what type of wood, hardware and construction specifications you must meet before beginning.
- This allows them to ventilate without being lifted by wind.
- Take measurements of the insides of windows to be fitted with shutters.
- Cut rails (vertical edges) to run the entire height of the window and stiles (the horizontal pieces of the frame) to fit between outside rails.
- If you plan more than one mullion, cut them to fit between the outside stiles, not alongside them, again adding a total of one inch for each tenon.
- Sand the whole piece lightly before finishing with stain and varnish or exterior paint.
Check out this related video from Homesteady on Youtube.