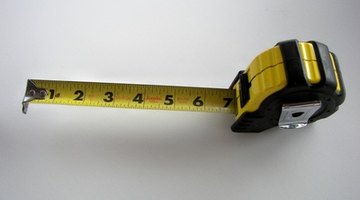
Tape Measure Calibration Procedures
Tools are available to help you accurately and easily calibrate your tape measures. Calibrating your tape measure regularly will keep your measurements consistently accurate.

If everyone you work with also check their tape measures for accuracy as often as you do, the measurements you work with every day will remain consistent across the board.
Having the Right Tool
If you have the right tools for the job, you can accomplish anything. It helps to have a tape measure calibrated so that it measures the correct distance every time. Measurement accuracy must be measured regularly in order to be sure your tapes do not begin to measure incorrectly. When a tape measure is calibrated to measure the correct distance, the tab at the end of the tape measure is set to the correct position. The correct position is different for each tape measure, so it is important to have one tool to calibrate multiple tape measures. The tool to use to calibrate tape measures is appropriately called a tape measure calibrator, and they are available online or through specific brick-and-mortar retailers.
Calibration Procedure
Check the push and pull measurements of your tape measure (they should remain the same) with a tape measure calibrator. Place the tape end tab in the calibration slot and check the measurements printed on the tape against the lines laser engraved into the tape measure calibration tool. They are etched on the tool at 10 mm and 6 inches. If the marks on the tape measure line up with the laser etch marks on the calibration tool according to your standards, there is nothing else you need to do.
However, if the marks are way off, there are a few things you can do to make the tape measure work accurately. If the pull measurement is off but the push measurement is good, the hook tab may be bent. There is a slot cut into the tape measure calibration tool that is meant to help you bend the tab end in or out to make the measurement accurate. If the end of the hook is not bent, it may have a metal burr that is left over from when the tab was made. If there is a burr or bump or something else on the tab, file it off with a small, flat metal file to smooth out the surface of the tab. After filing the tab, test the measurement on the calibrator. Conversely, if the pull measurement is good but the push measurement is not, the end of the tab may have something stuck to it. Various adhesives are the typical culprits. Shave or otherwise remove the adhesive, or whatever else is stuck to the end of the tab, and recheck the tape measure on the calibrator. The rivets that hold the tab onto the end of the tape measure may also be too loose to produce accurate measurements. The rivets can be tightened by using a hammer and a drift punch. Adjust the setting of the tab against the calibration marks and tighten the tab rivets so they hold the tab in place reliably.
It is possible that nothing you do will help the tape measure produce accurate measurements. If this is the case, replace the tape measure with an accurate one.
The Drip Cap
- Tools are available to help you accurately and easily calibrate your tape measures.
- When a tape measure is calibrated to measure the correct distance, the tab at the end of the tape measure is set to the correct position.
- Various adhesives are the typical culprits.
- Shave or otherwise remove the adhesive, or whatever else is stuck to the end of the tab, and recheck the tape measure on the calibrator.
- The rivets can be tightened by using a hammer and a drift punch.
- It is possible that nothing you do will help the tape measure produce accurate measurements.
Resources
Writer Bio
Kelly Nuttall is a student at Utah Valley University in Orem, Utah. She is set to graduate in the spring of 2011 with her bachelor's degree in technical communications. She has been writing for various websites since March of 2009.
Photo Credits
- tape measure image by Joann Cooper from Fotolia.com
- tape measure image by Joann Cooper from Fotolia.com
More Articles


