How to Hang Lattice Panels on a Deck
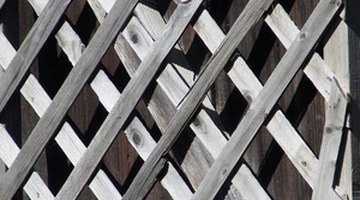
The space under a deck is not eye appealing. Using lattice around the bottom of the deck will give it a finished look. Lattice comes in 4-by-8-feet or 2-by-8-feet sheets and is available in pine, cedar, pressure-treated and vinyl. A wooden lattice can be painted or stained.

Vinyl comes in many colors and will never rot. There are several styles of lattice, such as garden or privacy style. The privacy style lattice has smaller openings.
-
Measure the distance between the 4-by-4 posts supporting the deck. Transfer the measurement onto a pair of 1-by-3 trim boards and cut. Screw or nail one of the boards to the top and the other down about 2 inches from the ground to the outside of the 4-by-4 posts, to support the lattice between the posts. Perform this step around the whole length of the deck and all exposed sides. If the deck is supported by several posts, measure from the end on the corner post to the center of the next post to leave a nailing surface for the next board.
-
Cut the lattice the length needed to go from post to post, subtracting 1 inch to allow for the lattice cap and divider molding. This will give you 1/2 inch on each side. Measure from the top of the post down to the ground in several areas to figure the height of the lattice. Use the shortest height so the lattice won't buckle against the ground. Using this measurement, subtract 1 inch to allow for the cap and divider molding.
-
Cut two pieces of the cap molding the length of the deck, or if it's longer than 8 feet, only cut the last piece to fit on the end. Cut the dividers to the height of the lattice subtracting 1 inch to allow for the cap molding. Only use the divider molding between two pieces of lattice. Use cap molding on the ends and corners.
-
Drill holes for the molding screws every 2 feet, before you attach the molding, so it doesn't crack when it's fastened to the 1-by-3 supports.
-
Screw the cap molding and lattice in place on the top 1-by-3 support boards, all the way around the deck, leaving 1/4 inch between the lattice. Don't tighten the screws all the way, to allow for expansion and contraction. Only screw through the lattice when attaching the top cap molding. Screw the bottom cap molding, leaving 1/4 inch for expansion between the molding and the lattice. Screw the sides and dividers into place the same way as the bottom cap molding. Don't screw through the lattice on the sides and divider molding.
Things You Will Need
- 1-by-3 trim boards
- Screws or nails
- Jigsaw or circular saw
- Drill
- Hammer
- Lattice
- Cap and divider molding
References
Writer Bio
Amanda Flanders has been writing since 2007. She received “Rising Star” awards for her articles published in 2010 and is educated in a wide range of home improvement topics and dog care. Flanders holds a certificate in Real Estate Appraisal from the University of Maine, Bangor and is certified in Standard Operating Procedures and Interpreting Animal Behavior for Safe Handling from Human Society University.
Photo Credits
- lattice image by Joann Cooper from Fotolia.com
- lattice image by Joann Cooper from Fotolia.com
More Articles


