
How to Build a Stone Wall With Round Stones & Cement

The graceful curving lines of a stone wall evoke a sense of elegance and romance that few other man-made structures can match. Although most long-lasting stone walls are composed primarily of large, flat stones that stack well, you can build a stone wall with round stones as long as you mortar them together.
Save money on purchasing premade mortar by mixing your own, which you can create by blending three parts of sand with one part of masonry cement, according to Plymouth Quarries, a stone quarrying company that has been in business since 1811.
Things You Will Need
- Round stones
- Metal rebar posts
- Hammer
- String
- Concrete
- 2-by-4-inch board
- Mortar (sand and cement)
- Water
- Wheelbarrow
- Scrap lumber
- Wire bristle brush
Tip
Check with your city office about obtaining any necessary permits before beginning construction on your wall.
Warning
Avoid lifting large stones to minimize possible back injuries.
-
Determine the height, width and length of your wall. Try to limit the height of your stone wall to less than 3 feet in order to stabilize the wall and help keep the round stones from putting too much pressure on the mortar that binds them together. As a general rule of thumb, plan on constructing a wall that is approximately half as wide as it is tall; for example, if your wall is going to be 18 inches tall, then it should be at least 9 inches wide.
-
Collect the round stones for your wall. Look for stones that are at least twice as large as your hands clasped together. Avoid any that are perfectly round since they’re more likely to compromise the strength of your wall. If you’re gathering stone from your own property, check creek beds for gently rounded, elongated stones that should work well to stabilize your wall.
-
Pound metal rebar posts into the ground with a hammer to mark the corner and end locations of your stone wall. Tie a string to one of the posts and run it tightly between the rest of the posts to mark the front (face) of your stone wall.
-
Dig your footer trench along the entire length of the marking string. The trench should be at least 12 inches wider than the base of your wall; for example, if your wall is 18 inches wide, then the footer trench should be 24 inches wide. Extend the depth of the trench to the frost line in order to minimize cracking in your wall during yearly freezing cycles; if you’re unsure what the frost line is in your area of the country, contact your county cooperative extension office.
-
Fill the footer trench with concrete. Level the concrete off approximately 1 inch below the soil line using a two-by-four board. Let the concrete cure for at least two to three days.
-
Mix your mortar with water in a wheelbarrow. Add enough water for the mortar to achieve a clay-like consistency. Dab the mortar on the concrete footer in a 1-inch layer. Select the largest, least round stones for the base course to provide a solid framework for the rest of your wall. Press the stones firmly into the mortar, positioning them as close together as possible.
-
Build the rest of your stone wall one layer at a time. Spread the mortar in small sections and fit the stones together, staggering the joints between the layers to further strengthen the wall. Angle the stones toward the center of the wall to help stabilize it.
-
Scoop out excess mortar from between the exposed stone joints with a thin piece of scrap lumber. Remove dried mortar smears from the faces of your stones using a wire bristle brush.
The Drip Cap
- The graceful curving lines of a stone wall evoke a sense of elegance and romance that few other man-made structures can match.
- As a general rule of thumb, plan on constructing a wall that is approximately half as wide as it is tall; for example, if your wall is going to be 18 inches tall, then it should be at least 9 inches wide.
- Avoid any that are perfectly round since they’re more likely to compromise the strength of your wall.
- Pound metal rebar posts into the ground with a hammer to mark the corner and end locations of your stone wall.
- Fill the footer trench with concrete.
- Let the concrete cure for at least two to three days.
Writer Bio
Regan Hennessy has been writing professionally for 11 years. A copywriter and certified teacher, Hennessy specializes in the areas of parenting, health, education, agriculture and personal finance. She has produced content for various websites and graduated from Lycoming College with a Bachelor of Arts in English.
Photo Credits
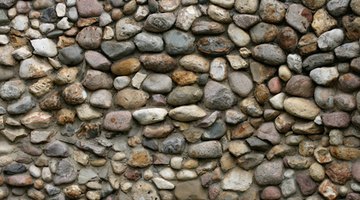
- stone wall image by Roman Sigaev from Fotolia.com
- stone wall image by Roman Sigaev from Fotolia.com
More Articles