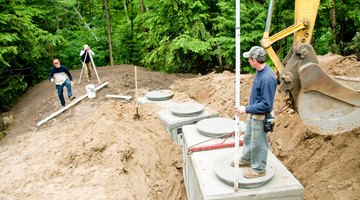
How to Waterproof a Concrete Septic Tank
In areas of the country where drought is a continuing concern, rainwater collection has become at least a supplementary water source.

Concrete septic tanks have been “re-purposed,” in many cases, as both above ground and underground water storage tanks, with the help of sealants approved by NSF International for use on potable or drinking water supply systems. Start with a clean, sanitized septic tank. Consider using NSF-approved sealants such as Thoroseal or Xypex even if you plan to collect and store rainwater only for bathing, irrigation and other non-potable uses, in case your situation changes.
Things You Will Need
- NSF-approved concrete sealant
- Large mixing tub, if needed
- Power drill with mixing paddle, if needed
- Spray bottle with water
- Plasterer’s spray gun
- Tampico masonry brush
- Salt
- Bucket
- Scrub brush
Tip
Cement-based waterproof coatings adhere more fiercely when mixed with the recommended acrylic polymer as well as water. NSF International started out as the National Sanitation Foundation at the University of Michigan's School of Public Health, to standardize sanitation and food safety requirements. It's now a widely respected third-party certification organization that tests and certifies products in the areas of food, water and environmental safety.
Warning
Carefully measuring wet and dry ingredients is essential for cement-based waterproof coatings, because either too much water or cement can cause the surface to crack and break. Careless mixing can cause the same problem.
-
Start with a septic tank that’s clean -- and sanitized, if necessary -- on the inside, which is the surface that will come in contact with your water supply.
-
Mix your waterproofing sealant thoroughly, following the product instructions and measuring proportions very carefully, if the product you’re using requires mixing.
-
Wet the inside surfaces with the spray bottle before applying waterproofing for cement-based applications. The entire surface must be damp for good adherence.
-
Apply the waterproofing base coat at the recommended thickness. For cement-based waterproof coatings, the first coat should be at least 1/16-inch thick. Spray on the coating, filling all pores, then brush it into the surface with the tampico brush, using horizontal strokes.
-
Let the first coat dry for at least 24 hours – again, follow your product instructions – before applying a second or top coat at least 1/32-inch thick. Dampen the septic tank walls again, using the spray bottle, before spraying the second coat. Finish that coat with vertical brush strokes.
-
Allow the coating to fully cure for at least five days. Mix up some salt water and thoroughly scrub the walls of your waterproofed septic tank – now a cistern – two or three times. Rinse the inside of the cistern thoroughly before filling it with water, or preparing it for rainwater collection.
The Drip Cap
- In areas of the country where drought is a continuing concern, rainwater collection has become at least a supplementary water source.
- Start with a clean, sanitized septic tank.
- Mix your waterproofing sealant thoroughly, following the product instructions and measuring proportions very carefully, if the product you’re using requires mixing.
- Finish that coat with vertical brush strokes.
References
Resources
Photo Credits
- Jupiterimages/Photos.com/Getty Images
- Jupiterimages/Photos.com/Getty Images
More Articles


