How to Make a Ditch With Concrete and River Rock
Drainage ditches are a common utilitarian feature of the home landscape. Wherever large volumes of water need to move across the property, a drainage ditch is the usually the best solution, though they are prone to erosion if not built correctly.

Lining the drainage ditch with concrete is an easy way to ensure that it won't erode in the future, but to create a more ornamental landscape feature, you can set river rock into the concrete as it dries. The key to this approach is to make a broad, shallow ditch that will be easy to line with concrete and river rocks.
Things You Will Need
- Shovel
- Hard metal rake
- Wheelbarrow
- Cement mixer
- Concrete mix
- Dust mask
- Concrete rake
- River rock
Tip
Plan the project when there are at least a couple days of dry weather forecast, to allow plenty of time to dig the trench and set the concrete before water moves through the area. Work with several other people when mixing and spreading the concrete so it can done as quickly as possible. Mixing, spreading and setting the stones can all happen simultaneously to prevent the concrete from drying before all the stones can be set. Start working from the top of the drainage ditch and proceed downhill.
Warning
Always wear a dust mask when working with concrete to prevent inhalation of the dust.
Call 811 before digging the drainage ditch to have the underground utilities marked on the property. Never dig in the vicinity of underground lines.
Contact a reputable contractor for advice on constructing a ditch in areas where a current of water greater than 4 feet wide and 6 inches deep runs in the heaviest rainstorms.
-
Excavate the drainage ditch. Remove vegetation from the area where water flows through the landscape, making a swath about 4 feet wide. Dig the center of the ditch about 6 inches deep and taper it up to meet the existing grade on either side of the ditch. Smooth out the soil on the bottom of the ditch with a rake.
-
Mix a batch of concrete. Use the minimum amount of water necessary to completely moisten the concrete mix, as a drier mix is much easier to spread on a slope than a wet, runny mix. Concrete mixers can be rented at most tool rental centers and mix the concrete much more quickly and uniformly than is possible by hand.
-
Pour the concrete from the mixer into a wheelbarrow and dump a load about every two feet down the length of the ditch. Spread the concrete mix over the area of bare earth with a concrete rake, taking care to make an even layer of over the entire area, aiming for a thickness of 2 to 3 inches.
-
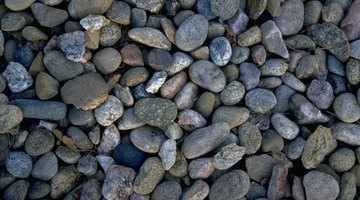
Place the river stones into the wet concrete. River rocks come in a wide range of sizes from tiny pebbles to small boulders. Drainage features look best if the size of the rocks are mixed to resemble a natural dry streambed. Press the larger rocks above 4 inches in diameter into the wet concrete so they appear as if they are embedded in a streamed. Scatter medium-sized rocks, in the 2- to 4-inch range, around the larger rocks on the surface of the concrete. Spread smaller rocks and pebbles to fill in the remaining spaces until the concrete is no longer visible. Spray off the stones lightly with a hose to wash off any concrete residue that ends up on the surface.
The Drip Cap
- Drainage ditches are a common utilitarian feature of the home landscape.
- Lining the drainage ditch with concrete is an easy way to ensure that it won't erode in the future, but to create a more ornamental landscape feature, you can set river rock into the concrete as it dries.
- Smooth out the soil on the bottom of the ditch with a rake.
- River rocks come in a wide range of sizes from tiny pebbles to small boulders.
References
Writer Bio
Brian Barth works in the fields of landscape architecture and urban planning and is co-founder of Urban Agriculture, Inc., an Atlanta-based design firm where he is head environmental consultant. He holds a Master's Degree in Environmental Planning and Design from the University of Georgia. His blog, Food for Thought, explores the themes of land use, urban agriculture, and environmental literacy.
Photo Credits
- Jupiterimages/Photos.com/Getty Images
- Jupiterimages/Photos.com/Getty Images
More Articles


