How to Use Floral Tape
Flowers offer brilliant colors and heady fragrances for your garden, but they also can bring those benefits into your house and grace special occasions. Harvesting flowers correctly will help them live longer after you cut them, giving you time to design stylish bouquets and other arrangements with them.
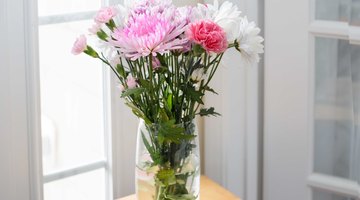
Floral tape holds flowers together without being obvious, but it doesn't work like other tapes: It takes a bit of a stretch to activate its stickiness.
Harvesting Flowers
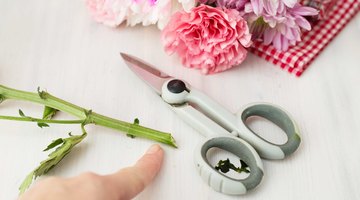
Flowers sometimes live up to two weeks after being cut and displayed in a home, but their long lives as decorations start with their harvest. Cutting flowers in early morning provides the best chance of success. They spend each night becoming hydrated and moving sugars through their vascular systems. So cutting flowers in early morning ensures they have nourishment. Use a sharp knife or shears to make an angled cut low on each stem; the cutting tool should slice cleanly through a stem without compressing it because compression can inhibit the stem's moisture intake in a vase of water. Placing the cut stems quickly in a tall bucket filled with water helps ensure only water -- not air -- enters the stems, providing a steady flow of moisture to help the blooms survive.
Making Small Arrangements
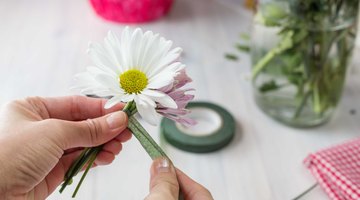
When you cut flowers for special events that need small arrangements such as corsages, boutonnieres, cake toppers or tiny bouquets attached to gathers in fabric, a vase can't be used to hold the stems in place. Floral tape is key. It is in several colors, such as green, black, white and brown, helping to hide stems. Arrange a few stems -- typically three or four with their heads, or ends, close together -- in your hand, and place the end of floral tape around the back of the stems. Hold the tape end in place with a finger while you pull the tape taut, stretching it slightly as you wrap it around the stems. Wrapping the stretched tape over itself makes it stick. The tape is covered in a wax adhesive that doesn't activate until the tape is stretched, and it sticks only to itself.
Continue wrapping the stems, maintaining consistent pressure on the tape as you pull it, and overlap it by at least one-half of the tape's width to ensure it sticks. When you want to stop taping, tear or cut the tape, pull it taut and secure that end to the last line of tape you applied. When you add stems, space their heads above or below the original set's heads, and wrap tape around all the stems, including those already taped, so an outer layer of tape holds all the stems together. The tape is a solid item to use when pinning the flower arrangement in place because pinning directly through flower stems is difficult.
Taking Control of Vases
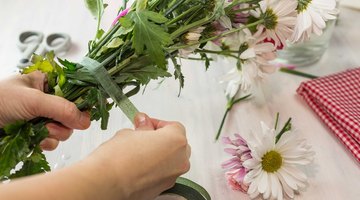
With the multitude of vase shapes available, it seems as if making a stunning flower design should be simple. Rarely, however, do arrangements made from the flowers in a garden look professionally designed, as if they came from a florist. Using floral tape helps hold flower stems in place without damaging them and allows the stems to sit in a vase's water, which promotes the flowers' longevity. Arranging flowers in one hand lets you see what the design looks like before you commit to it, and sliding the stems inside a vase while you continue to hold them ensures you make the arrangement the correct height and width. When you have the flower arrangement style and size you desire, hold the stems tightly in one hand while you wrap them with floral tape by using your other hand. As you wrap, pull the tape to stretch it so it adheres to itself. Overlapping it by about one-half of its width helps it adhere. The tape is made in several widths. Wider tapes work best with larger bouquets. Because water weakens floral tape, wrap just a couple of inches of stems above a vase's water line.
Removing the Tape
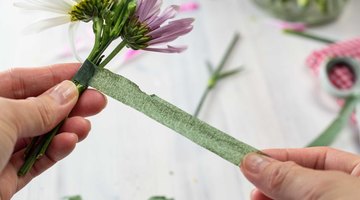
In order to remove floral tape when you need to rework your design, pull the tape's outside end free and simply unwrap it. Although floral tape sticks strongly to itself, breaking that bond is as simple as releasing the tension on the tape by lifting its end and pulling the tape away from itself. If you encounter a stubborn area of tape, rub it with a moist cloth so the water makes it release, or cut through the tape with scissors and pull it off the stems. Because the tape sticks to only itself, not stems, it comes off stems without harming them.
The Drip Cap
- Flowers offer brilliant colors and heady fragrances for your garden, but they also can bring those benefits into your house and grace special occasions.
- So cutting flowers in early morning ensures they have nourishment.
- Arrange a few stems -- typically three or four with their heads, or ends, close together -- in your hand, and place the end of floral tape around the back of the stems.
- With the multitude of vase shapes available, it seems as if making a stunning flower design should be simple.
- Using floral tape helps hold flower stems in place without damaging them and allows the stems to sit in a vase's water, which promotes the flowers' longevity.
- As you wrap, pull the tape to stretch it so it adheres to itself.
- In order to remove floral tape when you need to rework your design, pull the tape's outside end free and simply unwrap it.
References
Resources
Photo Credits
- Santy Gibson/Demand Media
- Santy Gibson/Demand Media
- Santy Gibson/Demand Media
- Santy Gibson/Demand Media
- Santy Gibson/Demand Media
- Santy Gibson/Demand Media
More Articles


