
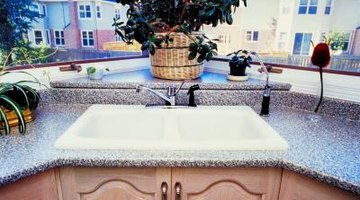
How To Reinforce a Granite Countertop

Granite countertops provide almost any home with a touch of elegance and charm. Made from natural, solid rock, granite proves durable and withstands cut marks from knives; it's actually harder than a stainless-steel knife. Granite also resists stains, burns and heat. Granite is also heavy, but any sturdy cabinetry can support its weight so long as the weight is distributed evenly across the cabinetry walls. Corner braces, sometimes installed to help strengthen the cabinets, don't really reinforce the countertop. Use plywood instead to reinforce the countertop and spread the weight across the entire cabinet framework.
Step 1
Lay a sheet of 3/4-inch plywood across the cabinet tops. Push the plywood snug against the back wall, where the countertop joins the back-splash area.
Step 2
Position the plywood, width-wise, as desired to allow for the granite countertop's overhang on the leading edge. For instance, if your granite countertop will overhang the counter 1 inch on every side, push the beginning end of the plywood over the edge 1 inch.
Step 3
Measure the leading edge of the plywood to ensure the overhang is accurate. Run a pencil along the edge of the cabinet, beneath the plywood, to mark the positioning of the plywood in relation to the cabinet.
Step 4
Continue marking the outline of the cabinetry, from below, around the front of the cabinets and along the final end. Mark the final end with an "F" as well to ensure you add the overhang length to this end, not the leading end, once you are finished.
Step 5
Crawl inside the cabinet and trace around the sink opening if you are working with an existing countertop underlay. Or, remove the plywood and proceed to the next step. The sink can be cut out later.
Step 6
Lay the plywood -- bottom, or marked, side up -- on your work surface or on top of the cabinets. Measure over from the final end mark, adding the dimension of the overhang required. Mark a straight line. Repeat for the front of the countertop, measuring from the existing line and drawing another to represent the overhang. Use a straightedge to connect all the overhang lines in rectangular or square shape.
Step 7
Cut along the outline created with the beginning end's mark, front mark and final end mark. Make sure you follow the final, larger marks on the front and final side, not the line representing the actual counter dimensions.
Step 8
Replace the plywood, laying it across the cabinet with the marked side down. Position it so the lines showing the cabinet measurements are aligned precisely with the cabinet.
Step 9
Measure and mark the plywood, on the upper side, to indicate the overhang dimensions. For example, a 2-inch overhang requires a mark 2 inches from the plywood edge. This provides a guide for screw placement.
Step 10
Drill holes slightly inside the screw placement lines that show where the cabinet walls are situated. Begin at one corner and ensure the drill enters the wall rather than the outside or inside of the cabinet. Insert screws to secure. Space every 8 to 10 inches.
Step 11
Screw up, through the cabinet braces, into the plywood underlay. Do not pierce the plywood surface, to avoid damage to the future granite countertop.
Step 12
Use a sink template to outline the sink area, if applicable. Measure from either end of the countertop to locate the sink opening in the cabinets. Set the template in place and trace the outline. Cut with a jigsaw to complete.
References
Resources
Tips
- Apply concrete backer board, if desired, especially when using granite tile. Follow the same procedure and cutting technique by scoring with a knife, similar to drywall cutting. Secure with screws driven through the backer board into the plywood. Countersink the screws, leaving them below the backer board surface. Apply a front edge skirt composed of backer board around the final underlay edge. Whether you install granite tile or a granite slab, a granite skirt covers this raw edge.
- Check to ensure cabinets are level before attaching the plywood. Run a level across the cabinets sideways, depth-wise and corner-to-corner. Insert thin shims to level, placing them on the cabinet wall edges and covering with the plywood.
Writer Bio
Karie Fay earned a Bachelor of Science in psychology with a minor in law from the University of Arkansas at Monticello. After growing up in construction and with more than 30 years in the field, she believes a girl can swing a hammer with the best of them. She enjoys "green" or innovative solutions and unusual construction.
Photo Credits
- Jupiterimages/Photos.com/Getty Images
More Articles