
How to Replace Woven Rocking Chair Seats

A country porch often features the rustic simplicity of a rush-woven rocking chair. This chair invites guests to immediately sit down and relax. Often the chair is pointed at the view and left to sit on the porch through most weather. Over time the exposure to sun and moisture will wear out the seat.
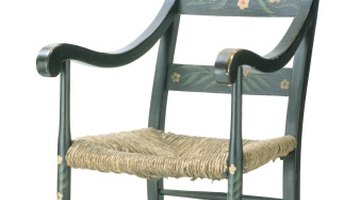
You can keep the chair in good shape by sealing the wood every other year, but rush will only hold up for a few years before you should reweave the seat. This is not hard and you can easily finish your chair in a few hours.
Things You Will Need
- Utility knife
- Pliers
- Straight edge
- Rush
- Scissors
- Tack
- Hammer
- Block
- Mallet
- Cardboard
-
Cut the old rush from the chair using a utility knife and discard it. Pull the tacks out with pliers and check the chair for damage. Repair any damage or refinish the chair before weaving new rush.
-
Measure your rush into 30 foot lengths. Each bundle is sold at 150 foot lengths so you should have 5 lengths per bundle. Dip your rush in water for 20 seconds to make it more flexible and easier to use.
-
Place the chair with the seat back away from you. Place a straight edge on the front rail toward the back rail so that the straight edge touches the inside of the left back seat post. Draw a line across the back and front rail using the straight edge. Repeat for the right side. Most chairs are wider at the front and you should see small triangular areas to the outsides of the lines. These are rushed first using half the full rush pattern.
-
Tack the end of the rush 1 inch from the front left post on the inside of the side rail. Use a hammer to drive the tack through the rush. Bring the rush up through the center of the seat and over the front rail tight against the left front leg post. Take the rush under and up through the center of the seat. Bring the rush to the left over the rush strand and the left side rail. Pull the rush under the left side rail and then through the center of the seat toward the right.
-
Bring the rush over the right side rail, then wrap it under the rail and bring it up through the center of the seat. Take the rush forward over the rush and front rail tight to the right front leg post and then under the front rail and up through the center of the seat. Bring the tail of the rush to the right side rail and tack the rush 1 inch from the right front leg along the inside of the right side rail. This is half the weave pattern.
-
Continue the half weave pattern by starting the next rush 1 1/2 inches from the left front post tacked to the inside of the side rail. Follow the same rush weave pattern to the right underside and tack the rush 1 1/2 inches from the right front post on the inside of the right side rail. Tighten the rush using a wood block and mallet tapping the rush toward the corner posts along the rails. Your last rush inside the triangle areas should start 1 inch from the left rear leg post.
-
Start your full weave by tacking the rush next to the left rear leg post on the inside of the left side rail. Follow the same half weave pattern described above except do not tack when you reach the right underside. Bring the rush up and over the back rail tight to the right rear leg post, under and up through the center of the seat. Take the rush over the rush to the right and tight to the right rear leg post. Then weave the rush over the right rail, under and up through the center of the seat.
-
Bring the rush to the left up and over the left side rail tight to the left rear leg post, under and up through the center of the seat. Take the rush over the rush and tight to the left rear leg post, over the back rail and under. This completes the pattern for the full weave. When you need to join rush together in the main body of the seat, you do so by knotting the rush together so that the knot will be on the left underside of the chair. In this way you can continue rushing as if the rush were one large piece. Place a temporary tack in the rush to hold it in place before tying the knot, this will keep the rush taut.
-
Weave the complete pattern for another inch. Cut trapezoid-shaped cardboard pieces to fit between the top and bottom layers of rush on each side. These help support the rush seat over time. Continue weaving until there is 1 inch open from the back to the front rail. Change to a simple figure-eight weave, bringing the rush up through the center, over the front rail and under, up through the center, over the back rail and under. Repeat until the seat is complete. Tack the end off to the closest inside back or front rail.
Tip
Seal your rush seat to preserve it over time. Use equal parts of paint thinner, boiled linseed oil and polyurethane. Apply 3 coats and allow each to dry completely between coats. Reseal the seat every 2-to-3 years.
The Drip Cap
- A country porch often features the rustic simplicity of a rush-woven rocking chair.
- This chair invites guests to immediately sit down and relax.
- Over time the exposure to sun and moisture will wear out the seat.
- This is not hard and you can easily finish your chair in a few hours.
- Cut the old rush from the chair using a utility knife and discard it.
- Measure your rush into 30 foot lengths.
- Repeat for the right side.
- Most chairs are wider at the front and you should see small triangular areas to the outsides of the lines.
- Follow the same rush weave pattern to the right underside and tack the rush 1 1/2 inches from the right front post on the inside of the right side rail.
- Bring the rush up and over the back rail tight to the right rear leg post, under and up through the center of the seat.
- When you need to join rush together in the main body of the seat, you do so by knotting the rush together so that the knot will be on the left underside of the chair.
Writer Bio
F.R.R. Mallory has been published since 1996, writing books, short stories, articles and essays. She has worked as an architect, restored cars, designed clothing, renovated homes and makes crafts. She is a graduate of the University of California at Berkeley with bachelor's degrees in psychology and English. Her fiction short story "Black Ice" recently won a National Space Society contest.
Photo Credits
- Comstock Images/Comstock/Getty Images
- Comstock Images/Comstock/Getty Images
More Articles