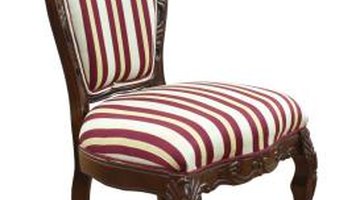
How to Repair Antique Spring Bottom Chair
Antique chairs with spring seats are common finds in flea markets, thrift stores and antique shops. While these chairs can be quite sturdy and comfortable, they may need some minor repair work to stand up to regular use. Repairing the springs is part of a complete re-upholstery project, or it can be a maintenance repair if the upholstery is in good condition. With a little TLC, your second-hand purchase can become a functional and stylish addition to your home.

Step 1
Wear a dust mask to prevent inhaling dust and fibers. Place the chair on its side or upside down so you can reach the underside easily. Use a screwdriver or chisel to pry the tacks from the burlap on the underside of the chair. Hold the screwdriver at an angle with the blade under the tack head and twist slightly to lift the tack. Tap the handle of the screwdriver lightly with a hammer if necessary. After the tacks have been removed, remove the old burlap, then the webbing.
Step 2
Remove the fabric, stuffing and padding from the seat of the chair to reveal the top side of the antique chair springs.
Step 3
Determine which springs are in need of repair or replacement. Examine the springs for rust, damage and excessive wear. Note how the springs are tied into place before proceeding.
Step 4
Count the number of rungs on the chair springs with the open ends pointing away from you to determine the size spring you need. Purchase the right size spring for your upholstery project, taking into account the number of rungs as well as the wire gauge. Take a spring with you to the upholstery shop when you buy replacements, if possible.
Step 5
Install new webbing on the underside of the chair frame. Lay the first strip in place across the frame, allowing a 2-inch overhang. Secure with two upholstery tacks, then fold the end over and secure with two to three more tacks. Continue with the remaining webbing strips, weaving the strips over and under one another until the webbing is secure and complete. Space the webbing strips according to the original webbing placement.
Step 6
Snip the twine that secures the springs in place. Replace any damaged springs. Re-tie the springs with waxed upholstery twine, securing the springs to each other and to the webbing intersections. Use the same tie style that was previously used to achieve an appearance similar to the original.
Step 7
Apply a burlap cover over the springs on the top side of the chair, securing it to the frame with a staple gun. Replace a layer of stuffing over the burlap, and cover with upholstery fabric. Use new fabric and stuffing, or reuse the old if you prefer. Staple a layer of burlap on the underside of the chair to cover the springs.
References
Resources
Tips
- Removing upholstery fabric can stretch it out of shape. Unless the original fabric has sentimental value or adds to the antique value of the piece, new fabric is typically sturdier and easier to clean.
- Old stuffing and padding is often full of tiny, broken fibers that filter through the fabric as dust. If you prefer reusing the old stuffing, you can place a layer of new padding over the old before applying the fabric. The extra layer helps fill bulges in the padding for a smooth upholstery job, and it can help reduce fine fiber particles that may filter through the fabric.
- If springs are slightly rusty but otherwise in good condition, rub folded emery cloth or fine-grit sand paper over the coils to remove surface rust.
Warnings
- Wear a dust mask and eye protection. If possible, work outdoors to avoid scattering dust in your home. Old upholstery and padding may contain allergens and unhealthy particles.
Writer Bio
With a master's degree in art history from the University of Missouri-Columbia, Michelle Powell-Smith has been writing professionally for more than a decade. An avid knitter and mother of four, she has written extensively on a wide variety of subjects, including education, test preparation, parenting, crafts and fashion.
Photo Credits
- beautygut/iStock/Getty Images
More Articles


