How To Hang a Suspended Ceiling From Steel Beams
Suspended or drop ceilings are used to conceal many types of overhead devices and equipment. In some cases, the concealed items are steel beams. Installation of a suspended ceiling requires anchor points, and the steel beams offer a solid base and can accommodate anchor points arguably more easily than wood joists or beams.

Step 1
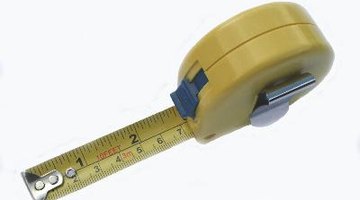
Measure and mark all exterior walls at the desired height of your ceiling.
Step 2
Install L brackets against the wall, lining up the base of the bracket with the marks. Secure the brackets to the walls using 2-inch screws. The brackets come in 12-foot lengths. Install all full lengths first, then measure and cut for any smaller pieces. Install all exterior brackets first. Using a level, periodically check that the bracket is lined up correctly.
Step 3
Measure for the spacing on the main T rails. These will be installed on 4-foot centers across the full width of the room.
Step 4
Install anchor points along each line in the overhead ceiling, in this case steel beams.
Step 5
Attach beam clamps to the steel beams at 3-foot intervals along the location for the T rail. The heavy-duty clamps are adjustable to fit most any size beam. Set the clamp in place, and tighten the set screw until it is secure on the beam.
Step 6
Secure one end of a hanger wire from each beam clamp and the other end to the T rail. Use standard hanger wire, which is sold in bulk rolls and can be custom cut to the lengths required. Check each section with the level to be certain the railing remains lined up as you secure each new hanger wire. Continue this process until all of the main T rails are installed, level and secure.
Step 7
Install the cross T rails. These 4-foot sections of rail will be installed between the main T rails at 2-foot intervals. The cross T rails will snap into place on the main T rails. When completed, the rails should form a grid with a series of 2-by-4-foot openings. Unless your room is divisible by four, you will have one row that is less than 4 feet. The rails for this section will need to be custom cut and fitted. Use tin snips to carefully cut the rails, and lay them in place along the main rails.
Step 8
With the support grid in place, begin installing the ceiling tiles. Start in one corner, installing all full-size ceiling tiles first. For the smaller spaces, measure each opening, and, using a utility knife, cut a ceiling tile to fit. Cut the tiles so they will fit snugly, without having to force them into place.
Writer Bio
Tom Raley is a freelance writer living in central Arkansas. He has been writing for more than 20 years and his short stories and articles have appeared in more than 25 different publications including P.I. Magazine, Pulsar and Writer's Digest.
Photo Credits
- tape measure 1 image by Martin Grice from Fotolia.com
More Articles


