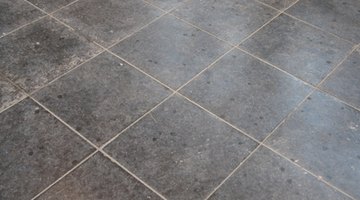
How to Lay Tile Floors With a Wire Mesh
Using wire mesh to support a tiled floor is common in residential installations where a wood subfloor exists. Placing the welded mesh fabric directly onto the wood floor, and then placing a bed of mortar to which the tile is adhered creates an extra bit of reinforcement for the floor. This method for installing tiles is time consuming, needing extra drying time compared to installing the tiles directly to the wooden subfloor. The results, however, create a strong solid floor surface suitable for heavy traffic areas.

-
Clean the wooden subfloor, removing any trace of dirt or debris using a wood cleaner suitable for the floor type. Allow the floor to dry completely before continuing.
-
Place a layer of 4-mm polyethylene sheeting over the surface of the floor to create a vapor barrier, overlapping 4 inches where the membrane sheets meet. The membrane aids in water resistance for the tiled floor and prevents moisture from affecting the mortar bed. Place a layer of 2 by 2-inch welded mesh fabric atop the membrane, overlapping 2 inches where fabric sheets meet. Staple the fabric and membrane securely to the wooden subfloor.
-
Create a mortar bed 3/4-inch thick on the surface of the metal mesh using deck mortar and float strips. Cut the wood lathe into 1-inch float strips using a utility knife, and soak them in a bucket of water to prevent the dry wood from leeching moisture from the mortar. Mix a batch of mortar in a large bucket consisting of one part Portland cement to five parts damp sand, adding water to the mixture until it is liquid enough to form a ball in your hand while still dry enough not to leave concrete residue from the forming.
-
Form columns of the mortar mixture throughout the tiling surface to the 3/4-inch height and place a float strip atop each column. Trowel the rest of the mortar onto the mesh between the columns, pressing the mortar firmly through the mesh and building it to the height of the bottom of the float strips. Remove the strips from the filled bed, and then use the trowel to remove the grooves left from the strips, creating a smooth surface. Allow the mortar bed 24 hours to cure before laying floor tiles.
-
Determine the placement of the tiles on the surface of the floor. Typical placement requires that you lay the tiles in uniform rows, spaced evenly with as many full tiles used as possible to prevent wastage from cutting.
-
Mix a second batch of mortar, this time adding enough water so that it is easily spreadable. Use a notched trowel to spread mortar across the surface of the mortar bed and then tilt the trowel to raise even ridges in the mortar for better coverage across the tile backs.
-
Lay the tiles onto the mortar, using a slight twisting motion to spread the mortar and placing them in the pre-determined positions. Space the tiles uniformly using tile spacers placed between adjoining tiles. Work from a wall outwards, or from the center of the room to the walls, leaving a 1/4-inch gap around the tiled surface between the tiles and walls. Cut tiles as necessary to fit using a tile cutter. Allow the mortar four hours to begin setting. Check the tile level during placement using a carpenter's level, knock uneven tiles into place using a rubber headed mallet.
-
Remove the tile spacers and then grout the joints between the tiles. Spread the grout across the surface of the tiles, forcing it into the joints in between tiles using a grout float. Remove excess grout from the tile surfaces and even the grout lines using a damp sponge 15 minutes after grout placement. Go over the surface of the tiles a second time two hours later using a clean lint-free cloth to remove grout residue from the tiles before it dries. Wait 7 to 10 days for the mortar to set.
-
Brush a layer of tile and grout sealant over the surface to protect the tiles from staining. Allow the sealant to dry overnight before using the floor.
References
Resources
Writer Bio
Larry Simmons is a freelance writer and expert in the fusion of computer technology and business. He has a B.S. in economics, an M.S. in information systems, an M.S. in communications technology, as well as significant work towards an M.B.A. in finance. He's published several hundred articles with Demand Studios.
Photo Credits
- Tiled floor image by Simon Amberly from Fotolia.com
More Articles


