
How to Make Extension Jambs for Andersen Windows

Extension jambs are used for replacement windows to increase the depth of the window jamb. A jamb is made of a strip of wood and allows the window to be installed flush into the wall. Some extension jambs are pre-cut to fit to size, while others need to be custom made. Making extension jambs for Andersen windows can be done with the right materials.
Step 1
Measure the height of the jambs that are already installed on the window and record the measurements on a piece of paper. Run a tape measure up the sides and along the top of the window to get the exact length of the jamb.
Step 2
Measure the width of the space between the window jamb and the wall to determine how thick the extension jamb will need to be. Most extension jambs measure 3/4-inch wide, while others may be a little thicker.
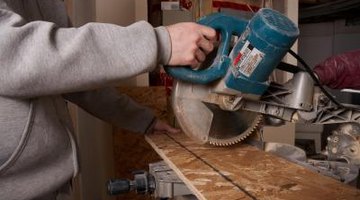
Step 3
Measure the distance of the first side on the one-by-one piece of lumber that will be used as the extension jamb, and mark it with a pencil. Slide it in the miter saw along the fence. Line up the mark with the blade of the saw. Pull down on the lever and cut through the piece at the mark. Put the jamb in the window to make sure it fits properly and repeat the procedure for the second side jamb.
Step 4
Run a tape measure along the top extension jamb piece to the desired measurement and mark it in the same manner as the first two. Cut the header extension jamb with a miter saw in the same manner as the side jambs and verify that it fits correctly into the window.
Writer Bio
Alexander Callos began writing in 2005 for "The Lantern" at The Ohio State University and has written for various websites, including Bleacher Report, Top Ten Real Estate Deals and Columbus Sports. He has published articles for CBS Sports, SI.com and other websites. He graduated in 2007 from The Ohio State University with a bachelor's degree in public affairs journalism.
Photo Credits
- Jupiterimages/Photos.com/Getty Images
More Articles