
How to Test a Submersible Water Pump Capacitor

Submersible pumps are used to prevent flooding in basements. They are also used in marine applications as bilge pumps and live wells, as irrigation pumps, and in ponds for water circulation and aeration. Capacitors in the submersible pump are used to ensure a constant supply of steady voltages and to provide bursts of power to electrical components controlling the pump. Capacitors contain two plates separated by an insulator. Incoming electricity charges the plates, which is then discharged in a steady state or as bursts. Always remove power and discharge the capacitor before testing to avoid electric shock.
Capacitor Access and Discharge
-
Remove power to the submersible pump. Use a wrench, screwdriver or socket set to remove the attached pump hoses. Loosen and remove any bolts or screws securing the pump to the mount plate, if attached.
-
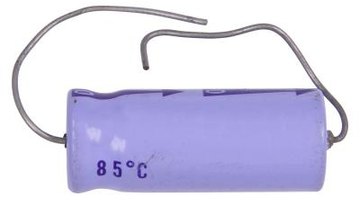
Locate and remove any screws or bolts on the pump housing protecting the internal circuitry. Keep any rubber or nylon washers removed with the screws or bolts. The washers are used to prevent water leakage and must be re-installed. Examine the capacitor to be tested for heavy corrosion, bulges or leaks.
-
Wrap a hand's width of heavy-gauge-copper wire with electrical tape. Bend the bare-copper wire into a shape that allows you to touch both capacitor leads simultaneously.
-
Grasp the copper wire by the tape-wrapped section. Do not touch the bare-copper wire during the discharge process, or electrocution could occur. Press the bare-copper wire against the two leads protruding from the capacitor. Hold the wire against the leads for 30 seconds to drain any electrical charge stored in the capacitor.
Testing
-
Adjust the multimeter tool to measure Ohms. The Ohms measurement may be labeled "Ohm," "Resistance" or more commonly "Ω." The upside-down-horseshoe shape is the Greek letter "Omega" and is used to represent Ohms measurement.
-
Hold either the black or red multimeter lead against either of the capacitor leads. Hold the remaining multimeter lead against the remaining capacitor lead.
-
Monitor the resistance measurement on the multimeter tool. Functional capacitors initially measure "zero" resistance followed by a slow, but steady, climb toward infinity. The resistance measure changes as the multimeter's battery slowly charges the capacitor through the connected leads.
-
Identify failed capacitors. Failed capacitors in an "open" state provide no measurement on the multimeter. Capacitors failing due to electrical shorts show a "zero" measurement only. Capacitors leaking stored power initially measure "zero" and climb toward infinity, but stops the climb as the capacitor starts leaking the charge.
-
Replace capacitors with obvious sings of failure, such as bulging or leaking, and capacitors failing the resistance test.
References
Tips
- Wear a pair of electrical-safety gloves for extra protection from electric shock.
Writer Bio
Skip Shelton has been writing since 2001, having authored and co-authored numerous articles for "Disclose Journal." He holds a Bachelor in Science in education and a Master of Business Administration with an emphasis in management from Northwest Nazarene University. Shelton also operates a small automotive maintenance and part-replacement shop.
Photo Credits
- Hemera Technologies/PhotoObjects.net/Getty Images
More Articles