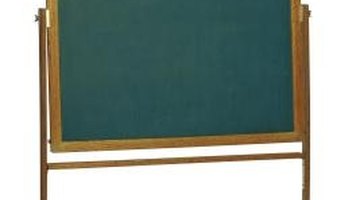
How to Make a Roll-Away Chalkboard
Not very long ago, the height of classroom technology consisted of a piece of chalk and a chalkboard at the front of the room. Today, chalkboards are still popular in some places, and children absolutely love the size and scale of what they can create on a simple chalkboard. If you would like one for you office, classroom, or child's playroom they are easily constructed and relatively inexpensive.
Assembling the Board

-
Cut all the wood pieces to length and round off the sharp corners with the sand paper.
-
Paint the MDF Board with the chalkboard paint (either one or both sides) and let paint dry completely.
-
Run a bead of glue along both sides of the MDF board and place a stile on each side. Use the hammer and small nails to secure the stiles in place. Both the bottom and top of the stiles should match up even with the top and bottom of the MDF Board.
-
Run a bead of glue along the top edge of the MDF and place the top rail on it flush up the edges with the stiles. Secure it in place using small nails.
-
Glue one of the 3/4" sides of the chalk rail and attach the rail lip to the chalk rail so that it is flush on the sides and bottom. It will resemble an "L" shape when completed.
-
Flip the board on its top and run a bead of glue along the bottom edge of the MDF and attach the chalk rail, edges flush with the stiles, using small nails. The chalk rail will protrude from the front of the board and act as a chalk tray.
Assembling the Legs
-
Attach one foot to the one leg at the center point of the foot creating a "T" shape using the wood screws, three screws in a triangular pattern.
-
Screw a foot brace to the foot on either side of the leg using three wood screws.
-
Screw an angle brace from the leg to a foot brace. The bottom of the angle brace should be flush with the bottom of the foot brace and should match up with the angle brace attached to the foot brace on the other side.
-
Drill a hole one inch from the end in the bottom where the foot and foot brace come together to accept the caster shanks.
-
Assemble the second leg exactly as you did the first leg.
-
Nail the cross brace in place using two small nails on each leg an inch above where the angle braces meet on the leg. Place the nails close to the top and bottom of the cross brace so there is room to drill two pilot holes through the legs and into ends of the cross brace. This will prevent the cross brace from splitting. Screw the cross brace to the legs using wood screws in the pilot holes.
-
Place the casters into their pre-drilled mounting holes.
-
Secure the framed chalkboard to the legs on both sides using three small nails on each side. Drill three pilot holes on each side through the legs and into the MDF board and screw the legs to the board.
References
Tips
- You can finish the look with some stain and sealant, or leave the wood natural.
- For a more finished look, use countersink screws and fill and sand the holes before applying the finish.
Writer Bio
Matthew Burch completed his undergraduate degree in English in 2007 and is currently working on dual Master of Arts degrees, one in English and one in rhetorical studies. He is a freelance writer and poet with past work appearing in the literary magazine, "The Albion Review."
Photo Credits
- Comstock/Comstock/Getty Images
More Articles


