How to Make Homemade Concrete Tiles
Concrete tiles create an organic warmth reminiscent of stone or clay. Making the tiles yourself allows you to customize their sizes and shapes them to the project at hand, such as a backsplash, flooring for a hallway or a tiled top for a table.

Premade tile molds designed for concrete, shallow baking pans or even sand may be used to create a form for the tiles.
Things You Will Need
- Plastic tarp
- Mold release
- Tile molds
- Bucket
- Quick-setting concrete
- Water
- Wooden spoon or paint stir stick
- Cardboard box
- Clean play sand
- Tile sample to replicate
- Packing tape
Tip
If you can't get a good impression of a tile using the sand-casting method, wet the top of the sand first. Wet sand holds more detail than dry sand for mold making. Other items that may be used for molds include sand toys, food packaging and takeout food containers.
Premade Mold Projects
-
Place a plastic tarp down over the work area and set the molds atop it. Working on the ground outdoors is ideal, so any spills beyond the tarp won't be as problematic as they would inside. The more molds you have, the more tiles you can make at once -- otherwise you'll have to wait until the cement hardens before reusing each mold.
-
Spray a mold release inside the molds to ensure the concrete comes out easily once it has hardened.
-
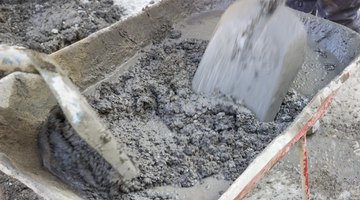
Mix the concrete and water in a bucket according to package directions, which may vary by brand. Use a wooden spoon or paint stir stick to stir the substance.
-
Pour some of the concrete into each mold, or spoon it in if that proves more manageable for you. Fill the molds to the top. Wiggle the molds back and forth a bit to help remove bubbles and air pockets. Allow the concrete to set overnight, or as recommended on the package.
-
Place your hand over the hardened cement in one mold and flip the mold into your hand to free the tile. If the tile does not come out immediately, set it gently on the tarp so the mold is upside down. Tap it gently with your fingers until the cement pops out.
Sand-Casted Tiles
-
Create duplicates of a favorite tile using sand as the mold form. Pour playground sand into a cardboard box larger and deeper than the tile. Use enough sand to ensure you can press the sample tile fully into the sand to get an accurate impression.
-
Pack the sand down a bit with your hands.
-
Place a loop of sticky tape, such as packing tape, on the back of the tile to create a handle. Press the sample tile into the sand, face down, deep enough to get a complete impression of the tile's top and sides. Lift the tile out by its tape handle.
-
Mix the concrete with water, according to package directions, in a bucket. Spoon or pour the wet concrete into the sand impression, using enough concrete to fill it completely. Allow it to dry overnight or according to concrete package directions. Lift the concrete tile out of the sand and brush loose sand away.
The Drip Cap
- Concrete tiles create an organic warmth reminiscent of stone or clay.
- Premade tile molds designed for concrete, shallow baking pans or even sand may be used to create a form for the tiles.
- Allow the concrete to set overnight, or as recommended on the package.
- Use enough sand to ensure you can press the sample tile fully into the sand to get an accurate impression.
- Place a loop of sticky tape, such as packing tape, on the back of the tile to create a handle.
- Lift the concrete tile out of the sand and brush loose sand away.
References
Resources
Writer Bio
Kathy Adams is an award-winning writer. She is an avid DIYer that is equally at home repurposing random objects into new, useful creations as she is at supporting community gardening efforts and writing about healthy alternatives to household chemicals. She's written numerous DIY articles for paint and decor companies, as well as for Black + Decker, Hunker, Landlordology, SFGate and others.
Photo Credits
- eyjafjallajokull/iStock/Getty Images
- eyjafjallajokull/iStock/Getty Images
More Articles


