
How to Make a 12 Volt Test Light

Twelve volt test lamps are relatively inexpensive and readily available, but making your own can teach you some valuable DIY skills like stripping wire and soldering. This is a project that you can complete in 15 minutes.
Everything that you will need for this project is readily available at any large hardware store, Radio Shack store or auto parts store. If you want to get fancy, you could purchase a socket for the bulb, but you can save a couple of dollars by soldering the wires directly to the bulb.
Things You Will Need
- Soldering iron
- Soldering sponge
- Rosin core solder
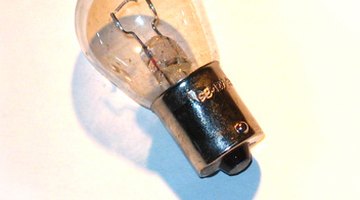
- 12-Volt bayonet bulb
- Emery cloth
- Set of test probes
- Wire cutters
- Wire strippers
- Black plastic electrical tape
-
Plug the soldering iron into a 110-volt receptacle and wait for the soldering iron to get hot. Wet the soldering iron sponge with water. Once hot, clean the soldering iron tip by wiping the hot tip on the wet soldering sponge.
-
Tin the soldering iron tip. Tinning is accomplished by coating the cleaned soldering iron tip with a lite coating of Rosin core solder. A properly tinned soldering iron tip will appear a bright silvery color. If the tip appears a dull gray, it needs to be cleaned and tinned again. A properly cleaned and tinned soldering iron tip is the first step in making good solder joints.
-
Clean the bulb's bayonet base using the emery cloth. A properly clean base will appear a bright brass color. The base needs to be clean, free of dirt and oxidation, for the Rosin core solder to adhere properly.
-
Cut the male plugs from the test probe leads using the wire cutters. Remove ¼ inch insulation from the freshly cut ends of the test leads and tin the stripped ends. Tin the stripped ends by applying the hot soldering iron tip to the underside of the wire. After waiting a few seconds for the wire to heat up, touch the Rosin core solder to the topside of the wire. The heat will draw the solder around and through the stranded wire. A properly tinned wire will be a bright silver color.
-
Tin a small area on the bulb's bayonet shell and tin the bottom button contact just as you tinned the test probe leads.
-
Solder one of the test probe leads to the bayonet shell and the other one to the bulb's bottom button. To make these solder connections, hold the wire in contact with the bulb's shell, apply heat to the shell, and touch the solder to the tinned wire. Repeat this process for soldering the wire to the bulb's bottom button.
-
Wrap the bulb's base and the attached wires with electric tape. Taping the bulb's base will prevent the bulb from accidentally shorting out if it comes in contact with a metal surface while in use.
The Drip Cap
- Twelve volt test lamps are relatively inexpensive and readily available, but making your own can teach you some valuable DIY skills like stripping wire and soldering.
- This is a project that you can complete in 15 minutes.
- Wet the soldering iron sponge with water.
- A properly tinned soldering iron tip will appear a bright silvery color.
- The base needs to be clean, free of dirt and oxidation, for the Rosin core solder to adhere properly.
- Solder one of the test probe leads to the bayonet shell and the other one to the bulb's bottom button.
References
Writer Bio
Based in Colorado Springs, Colo., Jerry Walch has been writing articles for the DIY market since 1974. His work has appeared in “Family Handyman” magazine, “Popular Science,” "Popular Mechanics," “Handy” and other publications. Walch spent 40 years working in the electrical trades and holds an Associate of Applied Science in applied electrical engineering technology from Alvin Junior College.
Photo Credits
- light bulb image by Edsweb from Fotolia.com
- light bulb image by Edsweb from Fotolia.com
More Articles