
How to Convert a Garage Floor for a Living Space

As families grow, many consider adding on to an existing home to give more space. Building a new addition to the home can prove costly. Some choose a less expensive alternative by converting the garage into additional living space. Typical rooms converted from garages include bedrooms, bathrooms and family rooms.
The garage shares similar obstacles with finishing a basement. You must deal with cold floors and obstructions such heating ducts and pipes. However, with proper planning, design and execution, a new living space can begin to be developed starting with the garage floor.
Tip
Install visqueen vapor barrier over your concrete slab to help prevent moisture.
-
Ask a local building inspector if there are any structural or zoning laws against converting a garage into a living space. Some zoning and neighborhood policies require space for parking a car in the garage.
-
Contact a plumber if you plan on converting at least part of your garage into a bathroom or kitchen area. Plumbing with a concrete floor may require cutting out an area of the floor for pipe installation. The plumber can look over the garage and suggest the best location for pipe installation.
-
Measure the height of your garage from the concrete floor to ceiling to determine what size joists to use in converting your floor. Allow space also for sub-floor and flooring on top of the joists.
-
Draw up a floor plan for your floor conversion. You can hire an architect or building contractor to do this, or draw it up yourself.
-
Measure to see if there is slope on the floor from the garage front to the door. If you have more than 1 inch of slope, shim the joists when you install them near the door with small wooden shims you can purchase at a home supply store.
-
Install either 2-by-2, 2-by-4 or 2-by-6 joists over the garage floor depending on how much room you have floor to ceiling. The taller the joists the more room for insulation and warmth of the floor. Lay the joists on edge across the width of the floor. Place them 16 inches apart. Nail cross-blocking boards to hold the joists together every 4 feet. Allow no more than a 1/2-inch space all the way around the edge walls of the garage for expansion space.
-
Insert rolled insulation between each joist. Staple the insulation to the top of the joists.
-
Install 4-by-8-foot sheets of particle board or plywood over the joists. Fasten with wood screws. Again, allow about a 1/2-inch expansion space from the garage walls. Decide on whether to install carpet, wood or tile flooring over the sub-floor.
The Drip Cap
- As families grow, many consider adding on to an existing home to give more space.
- Building a new addition to the home can prove costly.
- Some zoning and neighborhood policies require space for parking a car in the garage.
- If you have more than 1 inch of slope, shim the joists when you install them near the door with small wooden shims you can purchase at a home supply store.
- Place them 16 inches apart.
- Staple the insulation to the top of the joists.
References
Writer Bio
Greg Stone began writing professionally for various websites in September of 2010. He lives in Branson, Mo. and is the marketing director for Doulos Discipleship of Doulos Ministries. Stone holds a Bachelor of Science in journalism from Central Missouri University and a Master of Ministry from John Brown University.
Photo Credits
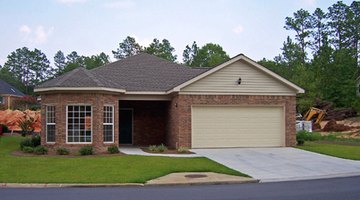
- brand new family home image by palms from Fotolia.com
- brand new family home image by palms from Fotolia.com
More Articles