
How to Repair a Concrete Sink

hese concrete sinks can last for decades with little maintenance required, but even the highest-quality concrete sink can need repairs. Because of the nature of concrete, you can repair most issues that arise with a concrete sink so that the repaired sink functions like new.
Used as a construction material, concrete creates strong and durable products. You can form the material into any shape, and with the use of molds, create a sink of any size to fit your needs. T You can even perform most of the necessary repairs without moving the sink from its installed spot.
Things You Will Need
- pH neutral cleanser
- Water
- Epoxy gel adhesive
- Crack chaser blade
- Steel trowel
- Putty knife
- Joint sealant repair
- Sandpaper
- Concrete sealant
-
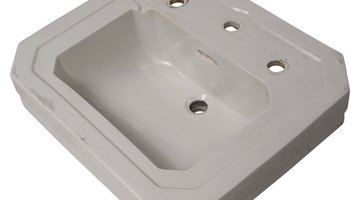
Cut the water supply leading to the sink and remove the drainpipe from beneath the sink. Place a bucket beneath the sink’s drain. Examine the sink, searching for the damage requiring repair. Common areas of damage include cracks or chips in the surface of the concrete, or breaks of large concrete chunks from the sink.
-
Repair any large breaks in the concrete first by reattaching broken concrete pieces to the sink. Clean the surface of the concrete both on the sink and on the broken piece using a mild pH-neutral cleanser such as Simple Green or Dr. Bronners natural soap, diluted in water. Scrub the concrete clean with a non-abrasive sponge and then rinse the surface with cool, clean water.
-
Apply a layer of epoxy gel adhesive to the broken edges of the concrete piece and then fit it into place on the sink. Hold it firmly into position for two to three minutes to allow the epoxy to begin to set and then remove any excess adhesive. Allow the epoxy to set for 24 hours.
-
Repair cracks and chips in the concrete surface of the sink by leveling the sides of the crack and rounding out the chipped areas using a crack chaser blade. Open the cracks with the blade, evening out the crack’s interior. Chip rough areas from the chips in the concrete, creating a smoother surface. Clean the inside of the crack or chip with a wire brush and then flush out the cleaned area with water to remove debris. Allow the cleaned cracks and chips to dry before continuing.
-
Fill the cracks or chips with joint repair sealant using a putty knife to pack the crack or chip. Remove any excess sealant on the surface of the area until you’ve leveled the sealant with the rest of the concrete. Allow 24 hours for the sealant to cure and then sand the sealant smooth and level with the surrounding sink surface.
-
Reseal the entire surface of the sink using a concrete sealant to protect the repairs and provide waterproofing for the concrete. Run water through the drain to remove and debris from the repair and then reattach the drainpipe to the sink.
Tip
Wear gloves and safety goggles when working with the crack chaser blade to protect against flying concrete chips.
The Drip Cap
- Used as a construction material, concrete creates strong and durable products.
- You can form the material into any shape, and with the use of molds, create a sink of any size to fit your needs.
- Allow the epoxy to set for 24 hours.
- Allow 24 hours for the sealant to cure and then sand the sealant smooth and level with the surrounding sink surface.
- Run water through the drain to remove and debris from the repair and then reattach the drainpipe to the sink.
References
Resources
Writer Bio
Larry Simmons is a freelance writer and expert in the fusion of computer technology and business. He has a B.S. in economics, an M.S. in information systems, an M.S. in communications technology, as well as significant work towards an M.B.A. in finance. He's published several hundred articles with Demand Studios.
Photo Credits
- Hemera Technologies/PhotoObjects.net/Getty Images
- Hemera Technologies/PhotoObjects.net/Getty Images
More Articles