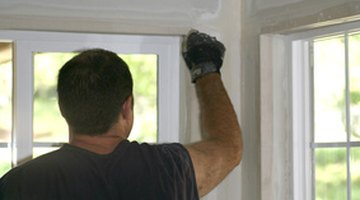
How to Replace Paneling With Sheetrock and the Cost of Replacement
Replacing paneling with sheetrock (also called wallboard or plasterboard) is an effective, affordable way to change the look of a room. Sheetrock gives a sleek, polished finish, in contrast to paneling's rugged, rustic look.

Removing paneling is relatively simple, requires no special skills and can be accomplished quickly. Hanging and finishing sheetrock, on the other hand, requires attention to detail and moderate carpentry skill. And it is messy: cutting, hanging and sanding sheetrock creates clouds of chalky dust, while applying joint compound is like making grown-up mud pies. Still, if you have the patience and desire, you can produce a near professional-quality result at a fraction of the cost.
Things You Will Need
- Sheetrock
- Joint compound
- Sheetrock tape
- Corner beads
- Sheetrock screws
- Straight edge
- Screw gun
- Jig saw
- Sheetrock saw
- 6-inch sheetrock knife
- 10-inch sheetrock knife
- Mixing pan
- Protector plates
Preparation
-
Measure the wall area to determine the number of sheetrock boards, buckets of joint compound, boxes of corner bead and boxes of screws needed. Order boards as close to ceiling height as possible. The price of sheetrock, screws and joint compound varies with location and market conditions. A large home improvement retailer currently (2010) sells sheetrock for $7 to $8 per sheet, depending on length and thickness; sheetrock tape about $9 a roll; joint compound about $12 a bucket; corner bead about $50 a box and screws for about $20 a bucket. Large home improvement retailers offer the most affordable prices for individuals.
-
Remove all sconces, smoke detectors, decorative items, outlet covers and switch plates from walls.
-
Find a seam and pry the first board of paneling from the studs. Continue around the room prying and removing paneling. Try to remove paneling and nails together, as this will save you work later.
-
Pull or hammer in any remaining nails.
-
Plan sheetrock placement so adjacent boards do not meet at door or window corners, i.e., cut each door and window opening from a single sheet. Avoid vertical joints above doors and windows. Attach protector plates where wires or pipes pass through studs to prevent punctures from wallboard screws.
Hanging
-
Stand the first sheet against the studs, making sure that it ends in the middle of a stud. Lift the panel tightly against the ceiling with a sheetrock lifter and screw in place, spacing a screw every 10 inches. Sink screw heads slightly below the surface, but do not tear the paper.
-
Continue hanging around the room, making cus for outlets, switches, sconces and smoke detectors where necessary. To make cuts for wall features, measure from the floor, minus the small space between the floor and sheetrock bottom, to the bottom of a feature and mark the distance on the sheetrock. Then measure from the edge of the nearest adjacent board to the feature's edge closest to it and mark that distance. Now measure the dimensions of the feature and outline it using the vertical and horizontal marks. Cut along the outline using the jig saw. Close is good enough since small gaps can be filled with joint compound.
-
Press a folded strip of sheetrock tape into the compound in each inside corner and smooth with a sheetrock knife. Attach a corner bead to each outside corner. Corner beads are thin, L-shaped pieces of metal or vinyl that cover and protect outside corners. Metal corner beads are older and more common, but vinyl is more flexible and less expensive. Attach metal with sheetrock screws, vinyl with joint compound
Finishing
-
Apply a thin layer of joint compound to each joint using a sheetrock knife. Center tape on the joint and press it firmly into the compound with the knife. Clear excess compound and smooth with a knife.
-
Apply a thin finish coat of compound using a 10-inch sheetrock knife. Allow the finish coat to dry overnight. Apply a final coat and let it harden.
-
Sand, prime and paint.
Tip
Have a helper to clean as you work to prevent a big mess.
Warning
Do not allow compound to sit open overnight; it will dry out.
The Drip Cap
- Replacing paneling with sheetrock (also called wallboard or plasterboard) is an effective, affordable way to change the look of a room.
- A large home improvement retailer currently (2010) sells sheetrock for $7 to $8 per sheet, depending on length and thickness; sheetrock tape about $9 a roll; joint compound about $12 a bucket; corner bead about $50 a box and screws for about $20 a bucket.
- Large home improvement retailers offer the most affordable prices for individuals.
- Continue around the room prying and removing paneling.
- To make cuts for wall features, measure from the floor, minus the small space between the floor and sheetrock bottom, to the bottom of a feature and mark the distance on the sheetrock.
- Cut along the outline using the jig saw.
- Center tape on the joint and press it firmly into the compound with the knife.
- Apply a thin finish coat of compound using a 10-inch sheetrock knife.
References
- "The Complete Guide to Home Carpentry"; Black and Decker; 2000
Writer Bio
Robert C. Young began writing professionally in 1989 as a copywriter for an advertising specialty company. From 2000 to 2007 he operated a real-estate development and construction company. His work has been published online at SFGate and various other websites. He graduated with a Bachelor of Business Administration in economics from Georgia State University.
Photo Credits
- drywall worker image by Sherri Camp from Fotolia.com
- drywall worker image by Sherri Camp from Fotolia.com
More Articles


