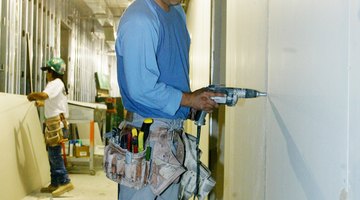
How to Install Blueboard Drywall
Blueboard drywall has a gypsum core like that of regular drywall that bonds with a thin coat of plaster to create an attractive wall and ceiling.

Things You Will Need
- T-bar support
- Drywall lift
- Drywall screw gun
- Utility knife
- T square
- Roll lifter
- Blueboard adhesive tape
- Plasterer's trowel
- Mortar hawk
Unlike regular drywall, which requires three to four days of feathering skim coats of joint compounds to finish seams, blueboard can be finished in one day if you can apply the right touch to smooth the plaster. The installation of blueboard resembles that of regular drywall.
-
Place the first panel against a corner of the ceiling so that its tapered edge falls on the center of a joist. Hold it in place with the help of an assistant, a T-bar support or a rented drywall lift.
-
Screw in drywall screws every 12 inches along the joists and 3/8 inch from the edges of the drywall. Make only the tiniest dimple with the screw so that the face paper can accept the veneer plaster. Speed the work with a specialized drywall screw gun. Stagger the butt ends of each panel so that they don’t line up by trimming the panels in subsequent rows with a utility knife and T square.
-
Work top to bottom, completing the ceiling and continuing to the upper walls. Run the 4-by-8-foot panels horizontally on the upper walls, pushing the panels up snugly against the ceiling without forcing them. Trim the lower wall panels if necessary to fit. Push them up snugly against the upper wall panels, stepping on a special tool called a roll lifter to lift the panel. Fasten with drywall screws to the studs as you did with the ceiling.
-
Press blueboard adhesive tape into the corners and over the seams.
-
Mix plaster of Paris with water according to the manufacturer’s instructions. Flank the joints by troweling a thin layer of plaster over them with a large plasterer’s trowel. Hold the plaster on a hawk, a flat plate with a handle. Avoid creating a buildup on the surrounding wall as you flank the joints. Allow the joints to set up for 15 minutes.
-
Apply a thin layer of plaster only 1/32-inch deep over the wall and ceiling with long, fluid motions. Splash a few drops of water on the plaster to smooth it if needed.
Tip
Keep the factory edges together wherever panels touch, recommends plastering contractor Bob Fragakis in an interview with handyman Bob Vila as seen on Vila’s TV show. This creates a smooth channel.
References
- Bob Vila: Drywall vs. Blueboard Explained
- Bob Vila: Blueboard and Plaster
- Reader's Digest New Complete Do-It-Yourself Manual; The Reader's Digest Association
Resources
Tips
- Keep the factory edges together wherever panels touch, recommends plastering contractor Bob Fragakis in an interview with handyman Bob Vila as seen on Vila’s TV show. This creates a smooth channel.
Writer Bio
An award-winning writer and editor, Rogue Parrish has worked at the Washington Post, the Baltimore Sun and at newspapers from England to Alaska. This world adventurer and travel book author, who graduates summa cum laude in journalism from the University of Maryland, specializes in travel and food -- as well as sports and fitness. She's also a property manager and writes on DIY projects.
Photo Credits
- Alex Wong/Getty Images News/Getty Images
- Alex Wong/Getty Images News/Getty Images
More Articles


