
How to Make a Wood Plate Rack

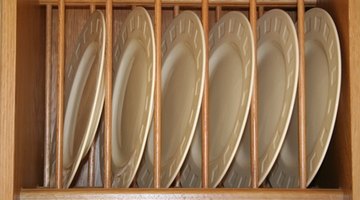
An oak plate rack allows you to show plates and can be made in an afternoon for the cost of a few dowels and some glue. Not counting the time required to cut the pieces or to allow the finish to dry, this plate rack can be assembled and installed in a kitchen cabinet in about half-hour.
Things You Will Need
- Protective eyewear
- Large piece of scrap wood, such as plywood (optional)
- 4 square oak dowels, 3/4 inch by 3/4 inch by 24 inches long
- 8 oak dowel rods, 3/8 inch diameter by 36 inches long
- Compound miter saw or table saw
- Fine grit sandpaper
- Drill press (or drill, 3/8 inch drill bit and masking tape)
- Wood glue
- Cordless drill and screwdriver bits
- 8 wood screws, 1-inch
- Polyurethane
- Oak wood stain (optional)
- Paint brush
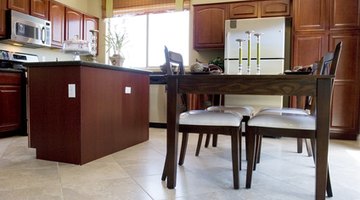
Instructions are for a standard wooden cabinet that is 24 inches wide.
-
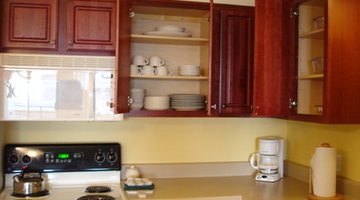
Remove the doors from the cabinet where you want to install your oak plate rack. Set them aside.
-
Cut the square dowels to fit the inside width of the cabinet, if necessary. Cut dowel rods (the round ones) to 11 1/4 inches. Sand all of the dowels smooth with fine grit sandpaper. You want a smooth finish to your wood rack, so take your time on this step.
-
Lay the scrap plywood on your work surface. Measure and mark the placement of the dowel rods on the square dowels. Starting at the left edges of the square dowels, place marks at 1/2 inch, 2 1/2 inches and every two inches after that (4 1/2 inches, 6 1/2 inches and so forth). The last gap will be larger than the others, to make room for a platter. Leave 1/2 inch gaps on the ends to allow for air circulation. If you want to put other dishes in your plate rack, such as serving dishes or more platters, and they require more space than 2 inches, make more than one of the spaces on the end wider than the others. You can make them all the same larger size if you wish, but keep in mind that you will have fewer slots in your plate rack if you do. Fewer but wider slots can help you show plates better, however.
-
Drill holes for the oak plate rack uprights. Drill the holes into the square dowels. If you don't have access to a drill press, you can still make this rack, it will just take a few minutes longer. Wrap masking tape around a 3/8 inch drill bit to mark a drilling depth of 3/8 inch. Put the drill bit into a cordless drill, center the bit exactly on the marks, hold the drill perfectly level, and carefully drill the holes.
-
Place one drop of wood glue into each hole in one of the square dowels. Only do the holes in one square dowel at a time. After putting glue in the last hole, slip a dowel rod into the first hole. Rotate the dowel rod to distribute the glue evenly around the inside of the hole. Repeat for each hole in that square dowel.
-
Put drops of glue into the holes in the second square dowel just as you did the first one and match it to the exposed ends of the dowel rods. Pick up the "ladder" you just made, with a square dowel in each hand, and press them firmly toward each other until the dowels have slid into the holes as far as they will go. This is called seating the dowels.
-
Repeat steps 5 and 6 to build the second "ladder." One "ladder" will go into the back of the cabinet, and the other will go into the front edge of the cabinet, and the plates and platters will slide into the rack and be held in place by both the front and back rods. Some people only place a "ladder" in the front of the cabinet, but this is not recommended because the plates and platters will not be held securely and can break against each other.
-
Finish plate rack ladders as desired to seal the wood. Use a paintbrush and wood stain, if desired. Whether you use wood stain, proceed with polyurethane finish. Apply at least three coats of polyurethane, allowing for drying time called for between coats as directed by the manufacturer.
-
Install your oak plate rack. Place one "ladder" about 3 inches from the back of the cabinet, and just to the right side of the leftmost dowel rod, drive a 1-inch long screw up through the square dowel and into the cabinet itself. Countersink the screw a bit, but take care not to drive screws all the way through the cabinet. Just to the left of the rightmost dowel rod, drive another screw up through the square dowel and into the cabinet. Drive a screw down into the bottom square dowel in the same locations, just inside the first and last dowel rods, and into the cabinet.
-
Place the front "ladder" flush against the front edge of the cabinet. Secure it with four screws, just as you did with the "ladder" that is in the back of the cabinet.


Tip
Using a piece of scrap wood as your work surface can help prevent gouges in your table or workbench. You can make your plate rack out of another kind of wood if desired, but oak tends to hold up better than most other types. When using polyurethane, brush it on with slow, smooth strokes to avoid bubbles in the finish. If you get bubbles or other imperfections in the finish of your wood rack, take the time to sand them out very lightly, wipe with a cloth and recoat the area.
Warning
Always wear protective eyewear when using power tools. There is a possibility of flying splinters. Take care when boring the holes for the dowel rods so that the drill bit does not slip. A wood rack must be sealed because unfinished wood absorbs moisture. This would cause the wood fibers to swell and the wood rack would warp out of shape, and the dowels would lose their uniform look. Even when properly sealed, wood will expand and contract with changes in temperature and humidity. If your wood rack does become warped, remove it from the cabinet, disassemble as much as necessary and sand it until it is smooth and uniform again. Refinish with at least one coat more of polyurethane than you used the last time, and reinstall it.
References
- "101 Saturday Morning Projects"; The Family Handyman; 2007
- "Building Furniture"; Fine Woodworking; 2007
- "33 Furniture Projects"; Fine Woodworking; 2010
- "101 Do-It-Yourself Projects"; Reader's Digest; 1983
Tips
- Using a piece of scrap wood as your work surface can help prevent gouges in your table or workbench.
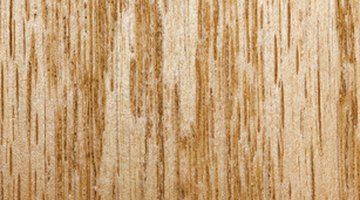
- You can make your plate rack out of another kind of wood if desired, but oak tends to hold up better than most other types.
- When using polyurethane, brush it on with slow, smooth strokes to avoid bubbles in the finish.
- If you get bubbles or other imperfections in the finish of your wood rack, take the time to sand them out very lightly, wipe with a cloth and recoat the area.
Warnings
- Always wear protective eyewear when using power tools. There is a possibility of flying splinters.
- Take care when boring the holes for the dowel rods so that the drill bit does not slip.
- A wood rack must be sealed because unfinished wood absorbs moisture. This would cause the wood fibers to swell and the wood rack would warp out of shape, and the dowels would lose their uniform look.
- Even when properly sealed, wood will expand and contract with changes in temperature and humidity.
- If your wood rack does become warped, remove it from the cabinet, disassemble as much as necessary and sand it until it is smooth and uniform again. Refinish with at least one coat more of polyurethane than you used the last time, and reinstall it.
Writer Bio
Jennifer Harshman has been a writer since 1990, writing, ghostwriting and editing both offline and online content. Her online articles focus on at-home projects. She writes in several fields, including health, business and do-it-yourself. Harshman has a Bachelor of Arts in education from Greenville College.
Photo Credits
- plate rack image by guiney from Fotolia.com
- plate rack image by guiney from Fotolia.com
- Modern kitchen image by MAXFX from Fotolia.com
- fruit platter image by Karin Lau from Fotolia.com
- bottle of glue on black marble image by phizics from Fotolia.com
- Oak Wood Grain Detail Close Up image by James Phelps from Fotolia.com
- kitchen image by Ritu Jethani from Fotolia.com
- plates image by victor zastol'skiy from Fotolia.com
More Articles