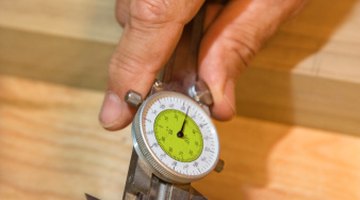
How to Calibrate a Dial Caliper
Calipers help operators measure tight dimensions accurately, which is critical to the overall integrity of parts in many manufacturing and construction-related industries. Applications for some industries, such as aerospace and semiconductor components, can require tolerances within 0.001 inch or tighter.

Failing to meet tolerances can result in possibly expensive part failures. Measurements with calipers and micrometers protect against improperly sized parts, but only if the operator can trust the measurements the tool provides. Operators must calibrate a dial caliper properly, before placing their full faith in the tool's accuracy.
Things You Will Need
- Clean cloth
- Gauge blocks
- 0.0001-inch accurate micrometer
-
Wipe the edges of gauge blocks, the jaws of the dial caliper and the flat anvil and spindle faces of a micrometer accurate to 0.0001 inch with a clean cloth. That will remove all residue or debris.
-
Calibrate for zero. Close the jaws of the caliper completely, but do not apply excess force. Check that the needle aligns with the "0" measurement on the dial. If necessary, loosen the locking screw securing the dial and rotate the bezel until the "0" marking aligns as perfectly as possible with the needle, then re-tighten the locking screw.
-
Calibrate for specific dimensions. Close the large outer jaws of the dial caliper gently but firmly around the edges of a 1-inch gauge block. Check that the caliper measures 1 inch.
-
Repeat with 4-inch and 8-inch gauge blocks, as well as a gauge block close to the final dimension of the product being measured.
-
Allow accuracy variations of up to 0.001 inch in the first 4 inches of the caliper, 0.0015 inch in the 4- to 8-inch range, and 0.002 inch from 8 to 12 inches. Mentally compensate for the variation in any measurements.
-
Set a micrometer at 1 inch. Close the anvil and spindle of a micrometer with 0.0001-inch accuracy around a 1-inch gauge block. Tighten the micrometer's locking screw or dial. Slip the gauge block free while keeping the micrometer's spindle locked at exactly 1 inch.
-
Measure the distance between the micrometer's anvil and spindle, using the small inner jaws located at the top of the dial calipers. Check that the dial caliper measures the 1-inch distance accurately.
-
Test the calipers with 4- and 8-inch micrometers if they are available. Use the same procedure you used to test the calipers with a micrometer set at 1 inch.
Tip
Lay differently sized gauge blocks next to one another to create longer lengths if necessary. Apply a small amount of lubrication to the edges of the gauge blocks, then slide the blocks together to form a tight seal. In this manner, a 4-inch, 3-inch and 1-inch gauge block can be combined to form an 8-inch block. Stop using a caliper that fails to meet calibration. Only use a micrometer with 0.0001-inch accuracy to help calibrate. Calipers are accurate to within 0.001 inch, and tools should be calibrated using a standard at least 10 times more accurate than the tool being calibrated.
The Drip Cap
- Calipers help operators measure tight dimensions accurately, which is critical to the overall integrity of parts in many manufacturing and construction-related industries.
- Measurements with calipers and micrometers protect against improperly sized parts, but only if the operator can trust the measurements the tool provides.
- Close the anvil and spindle of a micrometer with 0.0001-inch accuracy around a 1-inch gauge block.
- Tighten the micrometer's locking screw or dial.
- Test the calipers with 4- and 8-inch micrometers if they are available.
References
Writer Bio
Brad Chacos started writing professionally in 2005, specializing in electronics and technology. His work has appeared in Salon.com, Gizmodo, "PC Gamer," "Maximum PC," CIO.com, DigitalTrends.com, "Wired," FoxNews.com, NBCNews.com and more. Chacos is a frequent contributor to "PCWorld," "Laptop Magazine" and the Intuit Small Business Blog.
Photo Credits
- Jupiterimages/Comstock/Getty Images
- Jupiterimages/Comstock/Getty Images
More Articles


