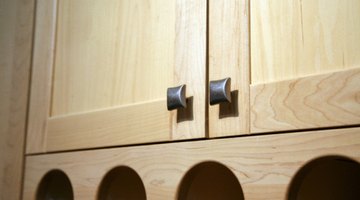
How to Pickle a Kitchen Cabinet
Exercise caution whenever a home improvement article begins “to do this, simply…” Finishes like pickling take patience to execute. There are three important steps in pickling; preparation, staining and sealing.

Things You Will Need
- Staining gloves
- Dust mask
- Safety glasses
- Fine and medium grit sandpaper
- Paper towels
- Newspaper
- Tack rags
- Lintless cloths
- Jar or box
- Two-step wood bleach
- Synthetic bleach brush
- White oil paint or whitewash
- Paint thinner
- Stain brush
- Wood sealer
- White shellac or non-yellowing varathane
- Denatured alcohol
- Mixing containers
Too often the first is skipped and the third consists of a thick coat of yellowish polyurethane, yielding a muddied result. Pickling should highlight the irregular pores, grain and crevices that make wood warm and interesting. On older cabinets, remove any paint or finish completely before starting.
Preparation
-
Set up a workspace in a well-ventilated basement or garage. Set up a workspace outdoors if you have more than a door or two to do. Spread newspapers to catch paint and thinner.
-
Remove doors from the cabinet base and remove all hardware from each door. Put reusable hardware in a jar or plastic food keeper so it won’t be mislaid.
-
Sand all surfaces with increasingly finer sandpaper until all scratches, dents and imperfections are worked flat. Clean the surface with a tack cloth.
-
Apply the first coat of the wood bleach, a compound containing either caustic soda or ammonia along the grain of the wood with a brush. Allow it to sit for 20 minutes or according to directions on the package.
-
Apply the second ingredient, hydrogen peroxide, over the first and let it bubble for 30 minutes to 1 hour depending on directions.
-
Flush the bleached wood with water and dry it with lintless rags or paper towels. Repeat and allow the wood to air dry for at least 24 hours.
Staining
-
Sand the wood with fine grit sandpaper to smooth the grain. Wipe the sanded wood with a tack cloth.
-
Apply white oil stain or pickling whitewash with a brush. Wipe the excess off with a clean rag.
-
Repeat staining and wiping if the effect is not deep enough. Two light layers will work into the grain and pores better than one thick one
-
Allow the stained wood to dry for at least 12 hours before finishing the other side and edges of the wood.
Sealing
-
Seal the pickled surfaces with a finish sealer or with a thin coat of white shellac and allow it to dry for 24 hours. Popular Woodworking’s Joe L’Erario suggests cutting one part of white shellac with 5 parts of denatured alcohol for a light sealer.
-
Sand surfaces lightly and clean with a tack cloth.
-
Apply two or more thin layers of non-yellowing varathane, shellac or brushing lacquer, sanding and cleaning between each layer. Follow container directions for drying times.
Tip
Use latex stain if you must but it dries faster than oil stain and is harder to wipe once it has started to dry. Dampen the rag with mineral spirits to wipe heavy stain and work it until it looks right. Mix thick oil-based stain with mineral spirits until it is thin enough to work into the wood. Invest in a box of disposable paint gloves. They save cleanup time in projects that have progressive, messy steps.
Warning
Never sand wood between coats of stain or finish until it is completely dry.
Wear eye protection when handling bleaching chemicals and a dust mask when sanding.
References
Resources
Writer Bio
An avid perennial gardener and old house owner, Laura Reynolds has had careers in teaching and juvenile justice. A retired municipal judgem Reynolds holds a degree in communications from Northern Illinois University. Her six children and stepchildren served as subjects of editorials during her tenure as a local newspaper editor.
Photo Credits
- Jupiterimages/Photos.com/Getty Images
- Jupiterimages/Photos.com/Getty Images
More Articles


