
How to Install Flagstone Indoors

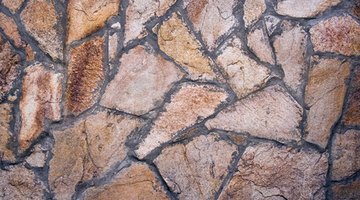
Installing flagstone indoors incorporates a distinct and artistic quality to any room. Flagstone is available from around the world and every quarry that lifts rock from the earth captures the unique characteristics of that particular region.
Things You Will Need
- Hammer
- Rock chisel
- Angle iron
- Grout float
- Grout sponge
- Square-notched trowel
- Mastic
- Buckets
Take time to discover the brilliant shades offered in flagstone and use it to complement an existing room or as a focal point to build the room on. One distinct advantage of flagstone over other flooring is that it will withstand water overflow better than any other flooring. Installed correctly, using high-end materials, a flagstone floor with provide years of service with minimal upkeep and cleaning.
Installing a Flagstone Floor
-
Shop different suppliers for flagstone that suits your particular taste. Look for characteristics in the rock that complement the room and select a flagstone you intend to have in place for years. Measure the existing floor and buy 1-inch thin flagstone. One ton of flagstone covers 110 to 125 sq. ft.
-
Remove existing floor and debris down to the subfloor. In most cases it will be exterior grade plywood found with pier-and-beam houses or a concrete slab. Inspect the floor level. For minor variations, proceed with the installation. If the floor has warping or cracks, apply a thin layer of self-leveling compound and allow for drying.
-
Lay out the flagstone pieces. Place the pieces to interlock with each other, somewhat like a jigsaw puzzle, and minimize the space between pieces. Find an attractive flagstone piece for the entrance of the room. It will always be seen and sets the ambiance. Use a piece of chalk to number the underside if needed.
-
Trim pieces to meet corners and edges. Thin flagstone can be cut to specifications. Score the flagstone with the rock chisel and place it on top of a piece of angle iron. Firmly hammer on the chisel over the score line and avoid trying to break the rock in one shot. Continue hammering until the rock meets proper dimensions. Sweep the floor of debris if necessary.
-
Spread a 1/2-inch layer of mastic over the floor in sections using the grout float tool. High-grade mastic is more expensive but worth the time you will save from redoing work. Work one section at a time to avoid the mastic from loosing elasticity. Allow the mastic one day to dry.
-
Select a grout color to complement the flagstone. Grout comes in many different colors. Choose one that either blends with the stone to create symmetry or an offsetting color to bring out the flagstone. Mix the grout in a bucket until it is a creamy texture. Use the grout float to pack the grout in between the flagstone pieces and wipe off excess with a damp grout sponge. To keep the grout moist, use a squirt bottle. Allow one full day for drying.
-
Apply a coat of sealants. Both the grout and the flagstone need to be sealed before the flagstone floor is open to traffic. In time, the stone will loose its luster and the grout will capture stain if not treated. Apply a grout seal and then apply a commercial stone enhancer. These two products seal the floor from moisture and keep out dirt. Reapply once a year.


Tip
To really draw focus to a flagstone floor, use another color stone around the border of the room. Environmentally friendly commercial sealants are available.
Warning
Wear safety glasses when chopping stone. Wear hearing protection when hammering.
References
Tips
- To really draw focus to a flagstone floor, use another color stone around the border of the room.
- Environmentally friendly commercial sealants are available.
Warnings
- Wear safety glasses when chopping stone.
- Wear hearing protection when hammering.
Writer Bio
Writer and photographer John Lightle writes out of the Plano/Dallas, Texas, area. His work has appeared in numerous publications, including Texoma Living!, Southwest Food Service News, and Just Labs Magazine. A former greenhouse worker for two years, he managed a seven-year xeriscape project.
Photo Credits
- texture - surrounding wall image by Slyadnyev Oleksandr from Fotolia.com
- texture - surrounding wall image by Slyadnyev Oleksandr from Fotolia.com
- utah sunset image by John Fatuzzo from Fotolia.com
- top level image by Stanislovas Kairys from Fotolia.com
- a curious pigeon staring at the photographer image by Dmitry Remesov from Fotolia.com
More Articles