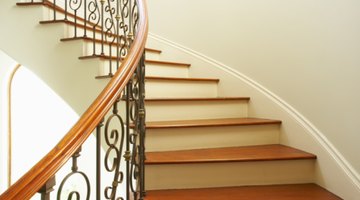
How to Make Curved Stairs
Curved stairs — freestanding, or attached to one or two walls — provide an upscale impression when they replace the more common L-shaped staircase. They require more time to construct and more engineering knowledge than conventional stairs.

Base the stairs’ curve on the radius of a circle to avoid using winders, steps that taper at one end. Home builder Mark Hall suggests purchasing a customized kit if your finish carpenters are inexperienced in building curved stairs.
Things You Will Need
- Tape measure
- Calculator
- Math compass
- Building plan
- Framing lumber
- Saw
- Nail gun or hammer
- Nails
- 3/16- to 1/8-inch-thick bendable sheets of hardwood or plywood
- Wood or construction adhesive
- Clamps and binding wraps
- Hardwood stock or plywood or OSB (oriented strand board)
- Router
- Trim headed screws
- Finish nails
-
Use the tape measure to determine the vertical rise of your staircase. Decide how high you want each step to be. Divide the total height (rise) by the individual step rise to get the number of steps needed. Locate on the building plan where the inside edge of the staircase meets the upper floor and use the compass to draw the stairs’ inner curve as the radius of a circle if possible. This makes it easier to preserve the aesthetic appeal of curved stairs while building safe, uniform-size steps. Draw the outer curve where your proposed step width would place it. Multiply the tread depth by the number of steps you calculated to ensure the steps will fill the stair pattern without excessively fitting each step or changing the curve too much. Also make sure this design fits within the area set aside for stairs. Adjust the step rise, tread depth and curve radius to develop a workable design.
-
Take into account the amount the curve itself adds to the length of each side of the staircase and make your stringers the appropriate lengths. Make sure they can handle the required weights and the torque the rising curve will produce. Create forms with framing lumber for bending the stringers. Apply adhesive to pieces of laminate the desired lengths, press the layers together, wipe off the excess adhesive and clamp them at 1-foot intervals to the forms. Leave the forms in for as long as a week.
-
Divide the total rise by the number of steps and subtract the thickness of the tread material. Cut the risers that height and the correct width. Create full-size patterns of the desired depth and width of every step and check them against the stringers before cutting the treads. Make a jig or pattern and use the router to cut grooves in the inner face of the stringers for riser boards and treads.
-
Attach risers and treads to stringer frames and to each other with trim screws and finish nails. Use framing lumber to make wedge blocks and install them underneath each step to strengthen the stairs. When the stair unit is completely assembled, attach it to the upper floor and at the bottom using adequate fasteners and header boards or plates. Attach the handrail. Finish the treads, risers and outer face of the stringers as desired.
Tip
Test the bendability, strength and spring-back — the tendency of artificially bent wood to return to its original straight shape — of your laminating materials before constructing the staircase. Choose materials for the tread and risers depending on how you will finish them. Use hardwood if you intend to stain them or OSB if you will cover them with carpet. Install the staircase before adding curved walls to minimize fit difficulties. Consider plywood or OSB instead of drywall for the curved knee wall(s). Consider using steel to support freestanding stairs.
Warning
Avoid changing the pitch or radius of your staircase as it rises, for aesthetic and construction reasons. Many building codes require each tread on a staircase to be the same depth. The allowable variance may be as little as 3/16 inch.
The Drip Cap
- Curved stairs — freestanding, or attached to one or two walls — provide an upscale impression when they replace the more common L-shaped staircase.
- Use the tape measure to determine the vertical rise of your staircase.
- Locate on the building plan where the inside edge of the staircase meets the upper floor and use the compass to draw the stairs’ inner curve as the radius of a circle if possible.
- Multiply the tread depth by the number of steps you calculated to ensure the steps will fill the stair pattern without excessively fitting each step or changing the curve too much.
- Leave the forms in for as long as a week.
- Attach risers and treads to stringer frames and to each other with trim screws and finish nails.
References
- Symmetrical Stair: FAQ: Curved Stairs
- Mark Hall; Custom Home Builder; Utopia, Texas
- Staircase Terminology/Spiral and Curved Staircases; December 2009
- Stair Supplies: How to Build Stairs
- On Bending Wood: “Circular Stairway”; Laszlo Gigacz; 1985
Resources
Writer Bio
Based in Texas, Catherine Hudgins began writing medical, technical, real-estate, travel and pet-care articles in 2000. Her articles have appeared in magazines such as “Food & Leisure," “MDNews,” and “CollegeBound." Hudgins received her Bachelor of Arts in fine art and Spanish from Trinity University.
Photo Credits
- Jupiterimages/Photos.com/Getty Images
- Jupiterimages/Photos.com/Getty Images
More Articles


