How to Build Storage Shelves Above Stairs
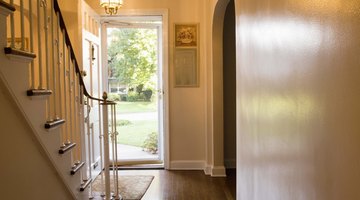
High overhead ceilings over a stairway can look elegant and spacious because it communicates that the homeowner has so much space that they can afford to waste it. On the rare occasion when you are schlepping a half-sized, plush, stuffed giraffe up to your daughter's bedroom, the empty overhead space can come in handy.

Things You Will Need
- Stepladder
- Scaffold plank
- Measuring tape
- Stud detector
- 1-by-2-inch board
- 3/4-inch plywood sheet
- Saw
- Level
- 2-inch wood screws
- Drill with Phillips head bit
- 200-grit sandpaper
However, on an everyday basis, the area above the stairs is mostly wasted space. One inventive way to use that space is to build storage or display shelves in the overhead area.
-
Position a stepladder at the bottom of the stairs, facing up the stairs. Slide a scaffold plank between the ladder supports and onto a rung that closely matches the height of one of the stairs. You want to pick a run and a stair that allows you to work on the back wall of the stairwell without leaning over or over-reaching so it is about eye-level.
-
Determine how high you want to hang the shelf. There are several things you need to take into consideration to prevent people from hitting their heads on the shelf -- the shallower the shelf, the lower you can hang it. Take one of the 1-by-2-inch boards, measure and mark it at 7 feet. Place the bottom of the board on the first step, and make a light pencil mark on the side wall of the stairwell at the 7 foot mark. Move the board up each step, and mark the side wall at the seven-foot mark. Draw a light line between these points. At no point can your shelf extend beyond that line. If your shelf won't fit without crossing this line, either make a shallower shelf or move it higher on the wall.
-
Measure the distance across the wall where you want the shelving. Also, measure both the sidewalls of the stairwell at the level you want to install the shelf.
-
Subtract 2 inches from the back wall measurement, and cut a 1-by-2-inch board this length. Cut two more pieces of 1-by-2-inch board to the depth that you want the shelf, assuming the side walls aren't shorter than the intended shelf.
-
Use the stud detector to locate studs at the back and side walls. Mark the wall lightly with a pencil where the studs are located.
-
Position the 1-by-2-inch board you cut to fit across the back of the wall, centered horizontally at the desired height of the shelf. Insert one 2-inch wood screw through the 1-by-2-inch board into a stud, but don't tighten it all the way down yet. Put the level on top of the board and adjust the board until it is level. Insert a second screw the 1-by-2-inch board and into the stud.
-
Tighten down the first screw, and put a screw through the board and into each stud on the wall. Repeat this procedure for the two shorter boards on the side walls, but additionally, the shorter boards have to be level with the board on the back wall. To check for this, simply place the level catty-corner across both boards and adjust the wall boards until the bubble shows level.
-
Measure and cut the shelf from the 3/4-inch plywood. Sand all of the edges with 200-grit sandpaper.
Tip
It is important that the shelf is level with gravity, not with the floor, or the walls. You can insert only 3 screws into the 1-by-2-inch boards if your shelf is shallow and not going to hold a lot of weight. Prime and paint the shelves to match the walls. Hang a short curtain from the ceiling to hide the storage area.
Warning
Do not store very heavy objects on this shelf if you made it deeper than 18 inches, or the wood will bow in the center. Do not secure the plywood shelf so that you can unload the shelf and lift it from the supports to move mattresses and other tall objects up and down the stairs. Use care when climbing a stepladder. Ensure that all four feet of the stepladder are firmly placed. Do not over-reach while on a stepladder. Tie back loose clothing and hair before operating power equipment. Wear safety goggles when using power equipment.
References
Resources
Tips
- It is important that the shelf is level with gravity, not with the floor, or the walls.
- You can insert only 3 screws into the 1-by-2-inch boards if your shelf is shallow and not going to hold a lot of weight.
- Prime and paint the shelves to match the walls. Hang a short curtain from the ceiling to hide the storage area.
Warnings
- Do not store very heavy objects on this shelf if you made it deeper than 18 inches, or the wood will bow in the center.
- Do not secure the plywood shelf so that you can unload the shelf and lift it from the supports to move mattresses and other tall objects up and down the stairs.
- Use care when climbing a stepladder.
- Ensure that all four feet of the stepladder are firmly placed.
- Do not over-reach while on a stepladder.
- Tie back loose clothing and hair before operating power equipment.
- Wear safety goggles when using power equipment.
Writer Bio
Writing fanzine-based articles since 1985, Kasandra Rose writes and edits articles for political and health blogs and TrueBloodNet.com and has an extensive technical writing background. She holds a Bachelor of Science in biology and a Bachelor of Arts in anthropology from the University of Michigan, and a Master of Arts in biology from Wayne State University.
Photo Credits
- Jupiterimages/Creatas/Getty Images
- Jupiterimages/Creatas/Getty Images
More Articles


