How to Turn the Top Part of a Hutch Into Bookshelves
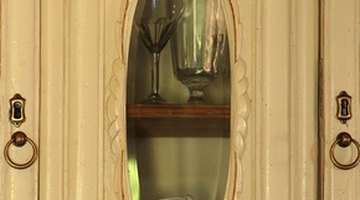
A hutch is a shelf-like unit that rests on top of a dining room buffet. The hutch will often have glass doors above an open area, which is usually level with the top of the buffet cabinet. The hutch may sit out as far as the buffet or it may be less deep. Often the hutch/cabinet combination favors a country furniture style and the top of the hutch is intended to show off ceramics and dishes. Converting a hutch top to a bookcase is usually a simple project.

-
Remove the hutch from the base using a screw driver. Most hutches will attach with a metal bar spanning the hutch and the cabinet. Place the hutch top face up on a work table.
-
Using a screwdriver, remove the glass doors from the hutch as well as all hinges, latches and other hardware. Remove any adjustable shelves and mirrors.
-
Use a putty knife to fill the screw holes with wood fill. Wipe off any excess putty.
-
Measure the distance between the inside top of the cabinet and the first fixed shelf. Most bookcases space their shelves 10 inches apart. A shelf spacing between 8 and 10 inches will house paperback books sufficiently. If your fixed shelf prevents the best spacing of shelves then you should remove the shelf to get the most out of your hutch.
-
Unscrew or otherwise remove the shelf from the hutch. Remove any protruding nails. Measure 11 inches down from the underside of the hutch and make at least two marks on each side and the back wall of the hutch. Draw level horizontal lines in pencil. Your bottom shelf may be taller than 11 inches but it must be at least 1 and 1/2 inches above the bottom edge of the cabinet. Stand your hutch on its side.
-
Measure the interior width of the cabinet and cut 1/2 by 1 inch wood to that length. Cut one board for each horizontal line across the back wall of the hutch. Apply a bead of carpenter's glue to the back of the board and line the board up with the bottom of the horizontal line. Screw through the back wall of the hutch into the board, spacing your screws 8 to 10 inches apart. The screws should not come through the face of the board.
-
Measure the depth of the shelf from the board you just mounted to the inside front of the hutch. Cut 1/2 by 1-inch wood to this length. Cut enough wood for as many horizontal lines you have drawn on the sides of the cabinet. Glue the board and screw it into place, but try to place screws at the back and front upper corners from the inside so screws will not be visible on the outside of the cabinet. Butt the board and keep the top of the board on the pencil line.
-
Stand the hutch up on its base. Measure and cut 1/2 by shelf size boards for shelves. Position the bottom shelf so it sits on the shelf supports and is flush against the back and side walls of the hutch. Nail finishing nails through the back of the shelf into the support, about 10 to 12 inches apart. Place at least two nails on each side. You may need to drill pilot holes if you use a hard wood for shelves.
-
Measure the width of the hutch from one outside corner horizontally to the other outside corner. Cut a piece of 1/2 by 2-inch wood to this length. This piece will be used to hide the gap between the bottom shelf and the floor. Position the wood across the bottom face of the hutch so that the wood is even with the sides and bottom of the hutch.
-
Add glue between the wood and the hutch where the back of the trim wood touches the face of the hutch. Secure the trim wood from the underside and back using L brackets and wood screws. Patch any holes with wood filler. Sand the hutch to clean up any marks and paint the bookcase to suit your decor.
Tips
- A hutch with crown molding may look awkward when it is converted to a bookshelf. You can remove the crown molding and replace the trim with something simple to improve the appearance.
Writer Bio
F.R.R. Mallory has been published since 1996, writing books, short stories, articles and essays. She has worked as an architect, restored cars, designed clothing, renovated homes and makes crafts. She is a graduate of the University of California at Berkeley with bachelor's degrees in psychology and English. Her fiction short story "Black Ice" recently won a National Space Society contest.
Photo Credits
- kitchen cupboard detail image by ewa kubicka from Fotolia.com
More Articles


