
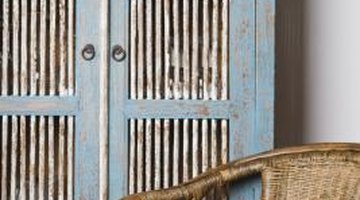
How to Make Cabinets Look Rustic With Paint

Instead of paying a premium to buy ready-made distressed cabinets, handy homeowners can give existing cabinets a unique rustic look with paint and a special paint technique. Since the rustic look is organic in nature, there's no need to follow a precise design. If the process doesn't produce the desired look, the cabinets can simply be repainted. After the paint has dried, the rustic look can be further enhanced by light sanding at the corners and drilling small holes to mimic wormholes and older wood.
Step 1
Remove all the hardware from the cabinets and set it aside.
Step 2
Sand the cabinets with medium-grit sandpaper. An orbital sander makes the job go faster, but cabinets can also be sanded by hand. If the base color of the cabinets is satisfactory, sand lightly to roughen the wood to help the primer stick. If the cabinets will be repainted a different color, sand them down to bare wood.
Step 3
Wipe the cabinets with a tack cloth to remove sanded material.
Step 4
Paint the cabinets with a high quality primer. Allow the primer to dry for the time specified by the manufacturer.
Step 5
Paint the cabinets with the base coat of paint, brushing or rolling in the direction of the wood grain, and allow it to thoroughly dry. This is the color that will show through the top coat of glaze.
Step 6
Paint the cabinet with a coat of glaze. Glaze is a thinned-down version of paint that is available in a wide range of colors. The glaze should be a couple of shades darker or lighter than the base color, depending on the desired finish. Black or brown glaze creates a rustic look on light-colored cabinets.
Step 7
Immediately wipe down the cabinets with a crumpled rag to wipe off some of the glaze. Work quickly to prevent the glaze from drying. Turn the rag from time to time. Use a light touch to leave more glaze on the surface; press harder to remove more glaze.
Step 8
Allow some of the glaze to remain in the corners of cabinet molding or depressions in the wood. With age, paint begins to wear off of cabinets, so leaving some glaze in these areas will mimic the natural process.
Step 9
Allow the glaze to dry for the time recommended by the manufacturer.
References
Resources
Tips
- Practice creating the rustic look on scrap wood to get an idea of how the finished product should look.
- Consider replacing the hinges and knobs with hardware that matches the rustic look of the cabinets.
Warnings
- Work in a well-ventilated area away from open flames.
Writer Bio
Lee Weal began writing and editing online content as a corporate intranet administrator in 2000 and was also the publisher and editor of a monthly employee newsletter. Her articles specialize in children's issues and home improvement.
Photo Credits
- Jupiterimages/Polka Dot/Getty Images
More Articles