How to Cut & Install Stair Skirts
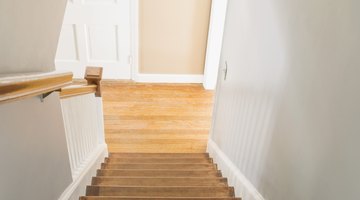
Stair skirts or skirt boards are large pieces of trim that run a staircase’s full length. They are mounted along the wall next to the staircase steps’ edges creating a more finished look. Staircase skirt boards are installed during the construction or added as a trim feature later.

Stair skirts must perfectly line up with the staircase stringers, so that both start and end at the proper angles and locations. The cutting and installing stair skirts requires some basic carpentry skill and common tools.
Things You Will Need
- 1-by-12-inch lumber
- Pencil
- Circular saw
- Straight edge
- Hammer
- Nails
- Chalk line
- Loose-leaf paper
- Jigsaw
- Router
- Work gloves
- Eye goggles
-
Lay a staircase stringer onto a length of 1-by-12-inch lumber, which becomes one of your star skirts. Trace the slope at both ends of the stringer onto the skirt with a pencil. Cut the skirt along the pencil marks with a circular saw. The skirt is now the same length, has the same landing angle at the bottom and the same rim joist attachment angle at the top, as does the stringer. Repeat the process with a second skirt board for the stairs’ other side.
-
Hold the skirt board against the wall in the same position it will be mounted. Use a straight edge and pencil for marking the location of the baseboard molding at the stairs’ bottom end onto the skirt. Cut a notch along the pencil lines with a circular saw, so that the baseboard and skirt board fit snugly together once installed.
-
Attach the stringers to the rim joist at the staircase’s top end and to the kickboard at the bottom end. Place a skirt board alongside the stringer nearest the wall, so that the top and bottom ends are both perfectly flush with the stringer. Fasten the skirt board to the stringer with a hammer and nails. Drive one nail every 8 inches or so through the stringer into the skirt board.
-
Place the second skirt board alongside the outer edge of the stringer furthest from the wall. Driving nails through the skirt into the stringer fastens it in place.
Tip
To install skirts on an existing staircase with no room between the wall and the stringers, creativity is necessary. Determine the height where you want the skirt board to sit along the wall next to your stairs. Snap a chalk line marking it. Lay sheets of loose-leaf paper against the wall in the angle formed by each riser and tread up to the chalk line. Using scissors, cut out any rounded bull noses or other details. Repeat the paper laying process at every step and use tape fastening all the paper stencils together. Remove the stencils and lay them on your skirt board material. Make the straight cuts with a circular saw and a jigsaw or router to finish off tight corners or rounded details. Slide the skirt over the steps’ edge and install it on the wall.
Warning
Use caution when working with tools like saws, hammers and nails. Wear work gloves and eye goggles for protection.
The Drip Cap
- Stair skirts or skirt boards are large pieces of trim that run a staircase’s full length.
- Staircase skirt boards are installed during the construction or added as a trim feature later.
- Trace the slope at both ends of the stringer onto the skirt with a pencil.
- Cut a notch along the pencil lines with a circular saw, so that the baseboard and skirt board fit snugly together once installed.
Writer Bio
Robert Morello has an extensive travel, marketing and business background. He graduated with a Bachelor of Arts from Columbia University in 2002 and has worked in travel as a guide, corporate senior marketing and product manager and travel consultant/expert. Morello is a professional writer and adjunct professor of travel and tourism.
Photo Credits
- Thinkstock Images/Comstock/Getty Images
- Thinkstock Images/Comstock/Getty Images
More Articles


