How to Attach Stringers to a Wall
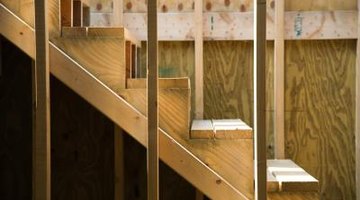
Stringers, sometimes called stair jacks, support stair treads and stair risers. A stringer is cut from a single piece of long dimensional lumber, like a 2-by-12, and a typical staircase has three or more stringers that run from the top of the stairs to the bottom. If the staircase will run along a wall, one of the stringers will attach securely to the adjacent wall framing. A header in the upper floor frame and trimmer joists will support the additional stringers. Your home’s architectural plans will determine the exact size of the stringers.

Step 1
Hold a stair stringer in place along the wall studs. Stair stringers vary in dimension to fit the space in which you’ll be building the staircase. This requires two people. One holds the top of the stringer flush with the top of the upper floor framing and the other positions the bottom of the stringer flat on the floor below.
Step 2
Make marks on the wall studs right below the bottom of the stringer. Mark more than one stud while holding the stringer in place.
Step 3
Cut a 2-by-4 to match the stringer dimensions. The easiest way to cut this board is to lay the stringer on the floor and hold a long 2-by-4 flush along the bottom edge of the stringer. Mark and cut the top and bottom of the 2-by-4 with a circular saw to match the angles of the stringer at the top and bottom.
Step 4
Position the cut 2-by-4 so the bottom of the board lines up with the guide marks you made on the wall studs. The top of the board should be flush with the top of the floor framing and the bottom of the board should rest evenly on the floor.
Step 5
Insert two framing nails, evenly spaced, through the 2-by-4 into every wall stud it crosses.
Step 6
Position the stair stringer so the bottom of the stringer is flush with the bottom of the installed 2-by-4.
Step 7
Nail the stringer to the 2-by-4 every 6 inches, from the bottom all the way to the top. Now, you’re ready to install the freestanding stringers.
Tips
- Determining riser depth and tread width requires dividing the distance between the top floor and the bottom floor into equal step dimensions. Your home plan should include stringer dimensions, but if you’re remodeling, consult a contractor or engineer to make sure your dimensions are correct before cutting the stringers.
Warnings
- Do not skip the installation of the 2-by-4 on the wall studs. This board provides a solid nailing surface that attaching the stringer to the wall does not offer. In addition, using the board keeps the nails in the bottom part of the stringer. Inserting nails higher in the stringer can split it because the cutout pattern for the stairs reduces the integrity of the stringer at that height. Using the board also allows you to install drywall behind the stringer and add a stair skirt along the top of the stairs for a finished look.
- In stair construction, contractors often use the 7/11 rule for building safe stairs. When designing your own stairs, the risers should be a maximum of 7 inches and the treads a minimum of 11 inches to create a safe staircase. This is a general rule, and actual dimensions will vary. Stairs that are too steep, or treads that are too narrow, can be hazardous.
Writer Bio
Glenda Taylor is a contractor and a full-time writer specializing in construction writing. She also enjoys writing business and finance, food and drink and pet-related articles. Her education includes marketing and a bachelor's degree in journalism from the University of Kansas.
Photo Credits
- Jupiterimages/Photos.com/Getty Images
More Articles


