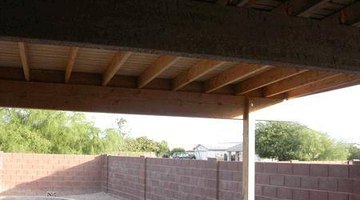
How to Build an Inexpensive Cover for a Patio
Adding a covering to an existing patio is a great way to add some shade and shelter from the rain. If you would like to tackle this project yourself and do it inexpensively, consider using a framed roof with asphalt shingles.

Asphalt shingles have long been a popular roofing option because of their affordability, and the posts and frame for the roof are not difficult to construct.
Things You Will Need
- Measuring tape
- Electric drill
- 1/2-inch masonry bit
- 4x4 post base connectors
- 3-inch-long, 1/2-inch expanding concrete bolts
- 4x4 lumber
- Circular saw
- 2x6 lumber
- 3-inch galvanized wood screws
- Galvanized screws and nails
- 6-inch-long, 1/2-inch-bolts with matching washers and nuts
- Joist hangers
- 2x4 lumber
- Stepladder
- 5/8-inch plywood sheathing
- 15-pound roofing felt
- Hammer
- Asphalt shingles
- Roofing tacks
Tip
Should you decide to go with a slope to your roof covering that is less than described above, use a roll-out type of asphalt roofing rather than shingles to prevent leakage.
-
Mark each corner of the patio 6 inches in from each edge. This will be the location for the posts to your roof. Set the post base connectors on the patio in these spots, and make sure they are aligned square with the edges of the patio.
-
Using the holes in the connectors as guides, mark the location for the expansion bolts on the concrete. Drill 1/2-inch-diameter, 3-inch-deep holes in these locations.
-
Set and align the post base connectors over the holes and fasten securely with the expanding concrete anchor bolts.
-
Measure and cut the posts for the porch covering from 4x4 lumber. Determine in which direction you want the covering to slope and cut posts for the high end longer than the low end, enough to create at least a 2-inch drop for every 12 inches for the high to the low end.
-
Set the 4x4 posts in the post base connectors, ensure that they are plumb, and fasten to the connector with the included hardware. Temporarily brace the posts.
-
Measure and cut four pieces of 2x6 lumber to a length of each of the sides of the finished patio covering plus 4 inches. Place the four pieces together in a rectangle to form the frame for the porch covering. Align them on the patio in the way that they will be raised up to the posts. Cut the ends of the beams at an angle to account for the slope of the roof, and allow their edges to be flush with the edges of the posts. Fasten the ends together securely with 3-inch galvanized wood screws.
-
Measure and drill two 1/2-inch holes all the way through each of the posts, 1 1/2 and 3 inches down from the top of the post and on center. Measure and drill corresponding holes on the 2x6 beams so that the holes will align when the frame is raised.
-
Get at least four other people to help you. Put one person at each corner of the frame with stepladders and raise the frame into place. Have one of the helpers insert the 6-inch bolts (with washers) through the holes in the beams and posts. Fasten the bolts tightly to secure the frame to the posts.
-
Nail or screw interior joist hangers to the frame every 16 inches on center. Measure and cut 2x4 lumber to size for the interior joists, set in the joist hangers and fasten with nails or screws.
-
Use 5/8-inch plywood sheathing to deck the porch covering, screwing it to the frame and interior joists. Roll out two layers of 15-pound roofing felt over the decking, overlapping the edges 4 inches. Tack it down with roofing tacks.
-
Shingle the roof with asphalt shingles. Paint, stain, or seal the posts and beams to your preference. Your porch covering is finished.

The Drip Cap
- Adding a covering to an existing patio is a great way to add some shade and shelter from the rain.
- Set the post base connectors on the patio in these spots, and make sure they are aligned square with the edges of the patio.
- Drill 1/2-inch-diameter, 3-inch-deep holes in these locations.
- Fasten the bolts tightly to secure the frame to the posts.
- Measure and cut 2x4 lumber to size for the interior joists, set in the joist hangers and fasten with nails or screws.
- Shingle the roof with asphalt shingles.
- Your porch covering is finished.
References
Resources
Writer Bio
Anthony Smith began writing for Demand Studios in May of 2009 and has since written over 1400 articles for them. He also writes for "The College Baseball Newsletter." He attended the University of New Mexico, and has more than 25 years of experience in the business world.
Photo Credits
- www.triteq.net/blog/index.php?blog=6&m=200711
- www.triteq.net/blog/index.php?blog=6&m=200711
More Articles


