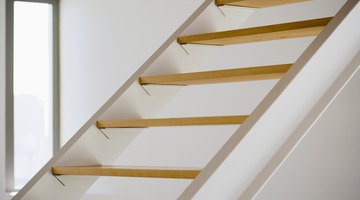
How to Make Steep Stairs Bigger
Building codes typically require that stair treads be within 3/4 inch of 10 inches wide. This includes the recommended 3/4- to 1 1/4-inch overhang.

If your treads are 10 inches wide and do not overhang, you can add a 1 1/4-inch overhang by replacing them with treads made from 1-by-12s that are actually 11 1/4 inches wide. Replacing the staircase with wider treads will result in longer, less steep stairs. That may be a problem if your stairs need to be steep in order to fit in a small space.
Things You Will Need
- Carpenter’s hammer
- Crowbar
- Handsaw
- Circular saw
- Carpenter’s square
- Carpenter’s pencil
- Paintbrush
- Paint or ¼-inch plywood with veneer to match treads
- Fine sandpaper
- Construction glue
- Wood filler
- Interior paint
- 2 1/2-inch spiral finishing nails
- 8d common nails
- 1-by-12-inch hardwood boards
- 1-by-8-inch boards
- 2-by-12-inch boards
- 2-by-4-inch board
Replace Treads
-
Measure your treads. If they have overhang you can remove them and install treads that have an overhang of up to 1 1/4 inches.
-
If you have 10-inch treads with no overhang, cut 1-by-12s the width of your staircase. It should be at least 3 feet wide. If you want more attractive stairs for the interior of your house, use hardwood.
-
Use your hammer to remove old treads as you replace them.
-
Install treads with construction glue and three finishing nails. Space nails 1 inch from each side of the tread and one in the middle. Fill the nail holes with wood filler.
Measure New Stairs
-
Divide the height the stairs reach by 7 ½, the recommended height of risers in inches. If you use the recommended 10-inch treads, calculate how many steps you need for a staircase slope of 34 to 37 degrees. Wider treads mean longer stairs.
-
Use your hammer and crowbar to remove the old stairs.
-
Use a pencil, carpenter’s square and saw to outline and cut a model of where the treads and risers will fit on a 2-by-12 riser. Ten-inch treads should sit on a 10 3/8-inch wide shelf; 7 ½-inch risers should fit against a 7 5/8-inch vertical support. The floor will be your first tread and the wall will be your last riser. Since they are both 3/4 inch thick, leave the bottom riser and the top tread ¾ inch short.
Cut Components
-
Using the model, pencil and saw, cut the places where the treads and risers will fit on three 2-by-12s.
-
If you want a finish with a veneer to match hardwood treads, use cardboard to make a model of the stringers you have just cut.
-
Cut your treads to the correct width. If they are made of hardwood, sand and apply polyurethane finish. Let them dry for one or two days.
-
Cut the risers from 1-by-8s to match the width of your stairs. Since risers should be 1/4 inch less than the height of the steps, 1-by-8s are ideal. They are actually 7 1/4 inches wide.
-
Measure and cut a 2-by-4 to support the stringers at the top of the stairs. Cut the support the same width as the stairs.
-
Cut the tops of the stringers so the wall will serve as the uppermost riser when they rest on the support.
Install New Stairs
-
Secure the stringers to the support with glue and two common nails for each stringer.
-
Place the support at the top of the wall and secure it to the studs with construction glue and two common nails.
-
Install the risers and treads, working one step at a time from the bottom of the stairs to the top. Install the riser then the tread on each step. Use construction glue and three finishing nails on each riser, one in the middle and two spaced 1 inch from the top and bottom. Install treads flush against the bottoms of the risers. Use construction glue and three finishing nails on each tread, one in the middle and two spaced 1 inch from each side. Apply wood filler to the nail holes.
The Drip Cap
- Building codes typically require that stair treads be within 3/4 inch of 10 inches wide.
- This includes the recommended 3/4- to 1 1/4-inch overhang.
- It should be at least 3 feet wide.
- Use your hammer to remove old treads as you replace them.
- If you use the recommended 10-inch treads, calculate how many steps you need for a staircase slope of 34 to 37 degrees.
- Use a pencil, carpenter’s square and saw to outline and cut a model of where the treads and risers will fit on a 2-by-12 riser.
- Since risers should be 1/4 inch less than the height of the steps, 1-by-8s are ideal.
- Secure the stringers to the support with glue and two common nails for each stringer.
- Use construction glue and three finishing nails on each riser, one in the middle and two spaced 1 inch from the top and bottom.
Photo Credits
- Jupiterimages/Polka Dot/Getty Images
- Jupiterimages/Polka Dot/Getty Images
More Articles


